How to Replace Fireplace Surround Tile
A fireplace surround is a decorative element that frames the fireplace and adds visual appeal to the room. It can be made from various materials, including tile, stone, brick, or wood. Over time, tiles on a fireplace surround can become damaged, cracked, or simply outdated. Replacing the tiles is a relatively simple DIY project that can dramatically enhance the look of your fireplace.
This article will guide you through the process of replacing fireplace surround tile. We will cover essential steps, safety precautions, and the tools you'll need. By following these instructions, you can revitalize your fireplace surround and make it a focal point of your living space.
Step 1: Preparation and Safety
Before starting the project, it is crucial to prepare the work area and take necessary safety precautions. Ensure ventilation in the room, as you will be working with materials that may release dust. Wear eye protection, gloves, and a dust mask to protect yourself from debris and potential irritants.
Here's a detailed checklist for preparation and safety:
- Clear the area around the fireplace: Remove furniture, rugs, and any other items that might obstruct your work or get damaged by dust.
- Cover the floor and surrounding areas: Use drop cloths or plastic sheeting to protect your flooring from dust and debris.
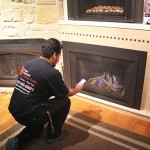
- Turn off the gas or electrical supply to the fireplace: This is essential for safety, especially if you're working near electrical wiring or gas lines.
- Wear appropriate safety gear: Eye protection, gloves, and a dust mask are crucial to protect yourself from dust and debris.
- Have a fire extinguisher readily available: This is essential for safety in case of any unexpected incidents.
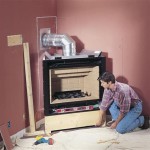
Step 2: Removing Existing Tile
Once you've prepared the area, it's time to remove the old tile. This step requires careful attention to avoid damaging the underlying substrate.
Follow these steps to remove the existing tile:
- Use a hammer and chisel to gently chip away the tile. Start at the edges and work your way inward. Be careful not to damage the underlying substrate.
- If the tile is stuck, you can use a grout saw to score the grout lines before chipping away the tile. This will help to weaken the bond between the tile and the substrate.
- Once the tile is removed, use a scraper or putty knife to remove any leftover mortar or adhesive. Be sure to clean the area thoroughly before installing the new tile.
Step 3: Setting the New Tile
After removing the old tile and cleaning the surface, you can start installing the new tile. This process involves applying mortar, setting the tile, and ensuring proper alignment.
Here's how to set the new tile:
- Apply a thin layer of mortar to the substrate using a notched trowel. The size of the notches on the trowel should match the size of the tile. This creates a consistent bed for the tile and ensures proper bonding.
- Carefully place the tile on the mortar bed, ensuring it is level and aligned with surrounding tiles. Use a rubber mallet to tap the tile firmly into place. You can adjust the position of the tile slightly before the mortar sets.
- Continue this process for all the tiles in the surround, ensuring that the grout lines are consistent and the tiles are level.
- Once all the tiles are in place, you can use a grout float to apply grout to the joints between the tiles. Follow the manufacturer's instructions for the recommended grouting time, and wipe away excess grout with a damp sponge.
Step 4: Cleaning and Finishing
The final step is cleaning the newly tiled surround and ensuring a professional finish.
Here's how to clean and finish the surround:
- Allow the grout to dry completely before cleaning the tile. Use a clean, damp cloth to wipe away any excess grout or mortar residue. Avoid using harsh chemicals or abrasive cleaners, as these can damage the tile.
- Polishing the tile: Depending on the type of tile, you may need to polish the surface to restore shine and remove any blemishes. Use a tile polish specifically designed for your tile type and follow the manufacturer's instructions.
- Apply sealant: To protect the tile from stains and water damage, apply a sealant to the surface. Select a sealant that is compatible with your tile type and follow the manufacturer's instructions carefully.
With these steps, you can successfully replace fireplace surround tile, enhancing the look of your fireplace and creating a more visually appealing living space.

Diy Tiling A Fireplace Surround What We Learned Along The Way

How To Remove Fireplace Tiles Chaotically Creative

Fireplace Makeover How To Tile Over A Surround Love Remodeled

Diy Tiling A Fireplace Surround What We Learned Along The Way

How To Tile A Fireplace My Uncommon Slice Of Suburbia

How To Tile Over An Existing Fireplace Surround My Woodlands Life

How To Prep A Fireplace For New Tile House One

7 Tips I Wish Knew Before Our Diy Tile Fireplace Makeover The Homeblondy

Diy Tile Fireplace Makeover Replacement Fireplaace

How To Tile Over A Marble Fireplace Surround Porch Daydreamer