Can I Tile Over My Marble Fireplace Surround?
Marble fireplace surrounds represent an elegant and enduring design choice in many homes. However, evolving aesthetic preferences or the desire to update a room's décor may lead homeowners to consider altering the existing marble. One common question that arises is whether it is possible to tile directly over a marble fireplace surround. The answer, while seemingly straightforward, involves several considerations encompassing preparation, adherence, and long-term durability.
The prospect of tiling over marble appears appealing for several reasons. Removing marble can be a messy and potentially damaging process, possibly affecting the surrounding wall structure. Tiling over it offers a way to avoid this demolition, potentially saving time and money. However, simply adhering tiles to a marble surface without proper preparation and materials can lead to significant problems down the line. Understanding the nuances of this process is crucial for achieving a successful and lasting result.
Key Point 1: Assessing the Existing Marble Surround
Before initiating any tiling project, a thorough assessment of the existing marble surround is paramount. This evaluation helps determine the feasibility of tiling over the marble and identifies any potential issues that need addressing. Several factors need careful consideration.
Firstly, examine the marble for any existing damage. Cracks, chips, or loose sections of marble need to be repaired or stabilized before any tiling work commences. Attempting to tile over damaged marble risks the new tiles cracking or becoming dislodged as the underlying marble continues to deteriorate. Small cracks can often be filled with epoxy-based repair compounds designed for stone. Larger cracks or loose sections may require professional assessment and repair, potentially involving the removal and re-setting of the affected marble pieces.
Secondly, evaluate the marble's surface. Marble typically has a polished, non-porous surface, which presents a challenge for tile adhesion. A smooth surface provides very little for the tile adhesive to grip onto, increasing the risk of the tiles detaching over time. The surface texture must be altered to create a suitable bonding surface. Methods for achieving this are discussed later in this article.
Thirdly, consider the thickness and overall stability of the marble surround. If the marble is thin or not securely attached to the underlying structure, the additional weight of the tiles could cause it to detach or crack. The entire assembly needs to be structurally sound to support the new tiling. If there is any doubt about the stability of the marble, reinforcing it is essential before proceeding.
Finally, assess the surrounding area. Consider how the new tiles will integrate with the existing wall finish, flooring, and mantel. Ensure that the added thickness of the tile will not cause any obstructions or create an aesthetically unappealing transition. It's important to plan the layout and ensure that the finished project looks seamless and intentional.
Key Point 2: Preparing the Marble Surface for Tiling
Effective preparation of the marble surface is the most critical step in ensuring a successful tiling project. Without proper preparation, even the best tile and adhesive will likely fail over time. The goal is to create a textured surface that provides a strong mechanical bond for the tile adhesive.
One common method is to roughen the marble surface using a diamond grinding pad. These pads, available in various grits, effectively remove the polished surface and create microscopic scratches that the adhesive can grip. It's crucial to use progressively finer grits to avoid damaging the marble excessively. Start with a coarser grit to create the initial texture and then move to a finer grit to smooth out any sharp edges. This process must be performed with caution, using water to keep the surface cool and prevent dust creation. Wear appropriate safety gear, including eye protection and a dust mask, during this process.
Following the grinding process, thoroughly clean the marble surface to remove any dust or debris. A degreasing cleaner designed for stone is recommended to remove any surface oils or contaminants. Rinse the surface thoroughly with clean water and allow it to dry completely before proceeding to the next step. Any remaining dust or contaminants can compromise the bond between the marble and the tile adhesive.
Another approach is to apply a bonding agent specifically designed for non-porous surfaces. These bonding agents are typically polymer-modified primers that create a tacky surface to which the tile adhesive can adhere. Follow the manufacturer's instructions carefully regarding application and drying time. Ensure the bonding agent is compatible with both the marble and the chosen tile adhesive.
Additionally, consider using a self-leveling underlayment if the marble surface is uneven. This will create a smooth, flat surface for tiling. Apply the self-leveling underlayment according to the manufacturer's instructions and allow it to cure completely before proceeding. Uneven surfaces can lead to uneven tile placement and increase the risk of tile cracking.
No matter the method chosen, ensure that the prepared marble surface is clean, dry, and provides a significantly improved surface for adhesion compared to the original polished surface. This preparation is the foundation for a durable and aesthetically pleasing tiled fireplace surround.
Key Point 3: Choosing the Right Tile and Adhesive
Selecting the appropriate tile and adhesive is essential for a successful tiling project over marble. The choice of materials will directly impact the durability, longevity, and overall aesthetic of the finished fireplace surround.
When choosing tiles, consider both the aesthetic and functional aspects. The weight of the tile is a crucial factor. Heavy tiles, such as natural stone or large-format porcelain, can put excessive stress on the marble surround and the underlying structure. Lighter tiles, such as ceramic or glass mosaic, are generally a better choice, especially if the marble is thin or not securely attached. Consider the style and color of the tiles to complement the existing décor. It is also important to choose tiles suitable for fireplace surrounds, which can be exposed to heat.
The tile adhesive is arguably the most critical component. A standard mortar is not suitable for tiling over marble due to the marble's non-porous nature. A modified thin-set mortar specifically formulated for bonding to non-porous surfaces is required. These mortars contain polymers that enhance adhesion and flexibility, allowing them to bond effectively to the marble and accommodate slight movement due to temperature fluctuations. Look for a mortar that is rated for use with porcelain or glass tiles, as these often have similar non-porous characteristics as marble.
Epoxy mortar is another option, offering superior bond strength and water resistance. However, epoxy mortar is more expensive and can be more challenging to work with due to its rapid setting time and demanding application requirements. It is generally recommended for experienced tilers. Ensure the chosen epoxy mortar is compatible with both the marble and the tiles being used.
Before applying the adhesive, it is advisable to perform a "dry fit" of the tiles. This involves arranging the tiles on the prepared marble surface without adhesive to ensure proper spacing and alignment. This step allows for adjustments and corrections before committing to the adhesive. Use tile spacers to maintain consistent grout lines. Proper spacing is crucial for both aesthetic appeal and structural integrity. It allows for expansion and contraction of the tiles due to temperature changes, preventing cracking.
Apply the adhesive according to the manufacturer's instructions, using the appropriate sized notched trowel to create consistent ridges. Press the tiles firmly into the adhesive, ensuring full contact between the tile and the mortar bed. Periodically check the tiles for level and alignment, making adjustments as needed. Clean any excess adhesive from the tile surfaces promptly. Allow the adhesive to cure completely before grouting.
Choosing the right grout is also important. Sanded grout is typically used for wider grout lines, while unsanded grout is suitable for narrower joints. Select a grout color that complements the tiles and the surrounding décor. Apply the grout according to the manufacturer's instructions, using a grout float to press the grout into the joints. Clean any excess grout from the tile surfaces immediately. Allow the grout to cure completely before sealing.
Finally, seal the grout to protect it from stains and moisture. A penetrating sealer is generally recommended. Apply the sealer according to the manufacturer's instructions. Sealing the grout will help to maintain its appearance and prevent the growth of mold and mildew.
By carefully selecting the appropriate tile and adhesive, and by following proper installation techniques, a durable, beautiful, and long-lasting tiled fireplace surround can be achieved, even when tiling over a marble surface.
In conclusion, tiling over a marble fireplace surround is a project achievable through careful planning and execution. Proper assessment of the existing marble, meticulous surface preparation, and the selection of appropriate materials are critical determinants of success. By adhering to these guidelines, homeowners can successfully transform their fireplace surround while potentially avoiding the complexities and costs associated with marble removal.

How To Tile Over A Marble Fireplace Surround Porch Daydreamer

How To Tile Over A Marble Fireplace Surround Porch Daydreamer

How To Tile Over A Marble Fireplace Surround Porch Daydreamer

How To Seal Marble Shine Your Light

How To Tile Over A Marble Fireplace Surround Porch Daydreamer

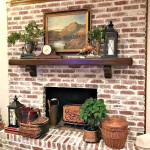
Marble Fireplace Makeover Centsational Style

How To Update The Fireplace Without Ripping Out Existing Marble Hometalk

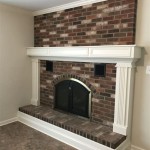
Our 200 Marble Fireplace Makeover Young House Love

Our 200 Marble Fireplace Makeover Young House Love

Our 200 Marble Fireplace Makeover Young House Love
Related Posts