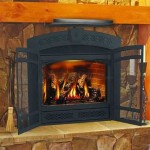
Painting Render Inside a Fireplace: Considerations and Techniques
Painting render inside a fireplace is a common aesthetic choice for homeowners looking to update or refresh the appearance of their hearth. Render, a type of plaster, is often used to create a smooth, durable surface within the firebox and on the fireplace surround. Painting this render can provide a clean, modern look or complement an existing design scheme. However, the process requires careful consideration and the use of appropriate materials to withstand the unique conditions present inside and around a fireplace. This article explores the key aspects of painting render inside a fireplace, including preparation, material selection, application techniques, and safety considerations.
Understanding the Fireplace Environment
The fireplace environment is significantly different from that of a typical interior wall. Fireplaces are exposed to high temperatures, soot, smoke, and moisture fluctuations. These conditions can rapidly degrade standard paints and cause them to peel, blister, or discolor. The porous nature of render also means it can absorb moisture and contaminants, exacerbating these issues. Therefore, it is essential to understand the specific challenges posed by a fireplace before undertaking any painting project.
High temperatures generated during fires can cause paint to break down, releasing potentially harmful volatile organic compounds (VOCs) into the air. Soot and smoke can quickly stain the paint, requiring frequent cleaning or repainting. Moisture, whether from condensation or rainwater entering the chimney, can seep into the render and lift the paint. The presence of existing soot and creosote can also hinder paint adhesion, leading to premature failure. Addressing these issues through proper preparation and material selection is critical for achieving a long-lasting and aesthetically pleasing finish.
Preparation is Paramount
Thorough preparation is arguably the most crucial step in painting render inside a fireplace. The condition of the existing render, the presence of soot or creosote, and any existing paint or coatings will all influence the preparation process. Neglecting proper preparation can result in poor paint adhesion, uneven coverage, and a finish that deteriorates quickly.
The first step is to thoroughly clean the render surface. This typically involves using a wire brush or scraper to remove any loose or flaking paint, soot, or debris. A specialized fireplace cleaner or a solution of trisodium phosphate (TSP) can be used to remove stubborn soot and creosote stains. It is important to follow the manufacturer's instructions carefully when using cleaning products and to wear appropriate protective gear, such as gloves and eye protection. After cleaning, the surface should be rinsed thoroughly with clean water and allowed to dry completely.
Once the surface is clean and dry, any cracks or imperfections in the render should be repaired. Small cracks can be filled with a suitable patching compound, while larger cracks may require more extensive repair work. The patching compound should be allowed to dry completely before being sanded smooth to blend with the surrounding render. If the render is particularly porous, a primer designed for porous surfaces can be applied to improve paint adhesion and reduce the amount of paint required.
Finally, the surrounding areas should be protected with drop cloths and painter's tape. This will prevent paint from splattering onto the floor, walls, or fireplace surround. Ensure that the tape is applied firmly to create a clean, crisp line.
Selecting the Right Paint
Choosing the correct type of paint is essential for achieving a durable and attractive finish on fireplace render. Standard interior paints are not suitable for this application due to their inability to withstand high temperatures and exposure to soot and smoke. While specialized high-temperature paints are often used for the metal components within a fireplace, such as the firebox, these paints may not be ideal for render due to their limited color options and potential for cracking.
The most common type of paint used for fireplace render is a heat-resistant masonry paint. These paints are designed to withstand high temperatures and are also resistant to moisture and staining. They are typically available in a range of colors and finishes, allowing for greater design flexibility. It is crucial to select a paint that is specifically formulated for use on masonry surfaces, as this will ensure proper adhesion and durability.
Another option is to use a mineral paint, such as silicate paint or lime wash. These paints are naturally breathable and resistant to mold and mildew, making them a good choice for fireplaces that are prone to moisture. They also have a matte finish that can create a traditional or rustic look. However, mineral paints can be more difficult to apply and may require specialized knowledge or equipment. It is essential to consult with a paint specialist or contractor before using mineral paint on fireplace render.
When selecting paint, it is also important to consider the VOC content. Low-VOC or zero-VOC paints are preferable, as they release fewer harmful chemicals into the air. This is particularly important in a fireplace environment, where high temperatures can exacerbate the release of VOCs. Look for paints that are labeled as low-VOC or zero-VOC and choose a reputable brand that has been tested for performance and durability.
Application Techniques for Optimal Results
Proper application techniques are essential for achieving a smooth, even, and long-lasting finish when painting render inside a fireplace. The method of application, the number of coats, and the drying time between coats can all influence the final outcome.
Before beginning, ensure that the paint is thoroughly mixed to ensure an even distribution of pigments and binders. Use a high-quality brush or roller designed for masonry surfaces. When using a brush, apply the paint in smooth, even strokes, working in small sections at a time. Avoid applying the paint too thickly, as this can lead to drips and runs. When using a roller, use a light to medium nap roller cover for smooth render, or a thicker nap roller for textured render. Overlap each pass of the roller slightly to ensure complete coverage.
Generally, two coats of paint are recommended for fireplace render. The first coat acts as a primer, sealing the render and providing a base for the second coat. Allow the first coat to dry completely according to the manufacturer's instructions before applying the second coat. The second coat will provide the final color and coverage. Apply the second coat in the same manner as the first, ensuring smooth, even strokes.
Pay particular attention to corners and edges, as these areas can be difficult to paint evenly. Use a brush to carefully paint these areas, ensuring that the paint is applied smoothly and without drips or runs. After applying the paint, inspect the surface for any imperfections, such as drips, runs, or missed spots. Correct these imperfections immediately while the paint is still wet. Once the paint is dry, allow it to cure for the recommended time before using the fireplace.
Safety Considerations and Maintenance
Safety is paramount when working with any painting project, especially in a fireplace environment. Proper ventilation is crucial to prevent the build-up of fumes from paint or cleaning products. Wear appropriate protective gear, such as gloves, eye protection, and a respirator, especially when working with cleaning solutions or paints that contain VOCs.
Ensure that the fireplace is completely cool before beginning any work. Never paint a hot fireplace, as this can cause the paint to blister or catch fire. Also, be aware of the potential for dust and debris to be released during the preparation process. Wear a dust mask to protect your lungs and clean up thoroughly after completing the project.
Once the paint has been applied, regular maintenance is essential to keeping it looking its best. Clean the render surface regularly with a soft brush or cloth to remove soot and dust. Avoid using harsh chemicals or abrasive cleaners, as these can damage the paint. If necessary, use a mild soap and water solution. Rinse the surface thoroughly with clean water and allow it to dry completely.
Inspect the paint regularly for any signs of damage, such as cracks, peeling, or discoloration. If any damage is found, repair it promptly to prevent further deterioration. Small cracks can be filled with a suitable patching compound and touched up with paint. Larger areas of damage may require more extensive repairs. By following these safety precautions and maintenance tips, one can ensure that the painted fireplace render remains attractive and durable for years to come.

Tips For Painting Behind Wood Burners And Fireplace Surrounds Earthborn Paints

How To Paint Behind A Wood Burner Brewers Know The Decorating Knowledge And Advice You Need

Can I Paint Inside This Fireplace Houzz

Tips For Painting Behind Wood Burners And Fireplace Surrounds Earthborn Paints

Tips For Painting Behind Wood Burners And Fireplace Surrounds Earthborn Paints
Render Inside Fireplace Diynot Forums

At A Loss On What To Do With My Fireplac Bunnings Work Community

See How I Made Over An Ugly Clunky Stone Veneer Fireplace With Paint

See How I Made Over An Ugly Clunky Stone Veneer Fireplace With Paint

Tips For Painting Behind Wood Burners And Fireplace Surrounds Earthborn Paints
Related Posts

