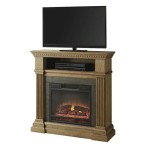
DIY Fireplace Stone Hearth: A Step-by-Step Guide
A fireplace hearth is an essential safety and aesthetic feature that adds charm and warmth to any home. While professionally installed hearths can be costly, building your own stone hearth is a rewarding and achievable DIY project for those with basic construction skills. This article will guide you through the process of constructing a DIY stone hearth, highlighting key steps and considerations for a successful and safe installation.
Planning and Preparation
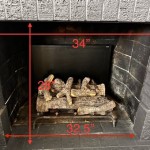
Before you begin, careful planning is crucial for a successful outcome. The first step involves determining the size and shape of your desired hearth. Consider the existing fireplace opening, the size of the room, and the overall design aesthetic. You will also need to choose the type of stone for your hearth. Options include natural stone such as slate, granite, or limestone, as well as manufactured stone veneer. Ensure the chosen stone is fire-resistant and appropriate for outdoor applications.
Next, gather the necessary tools and materials. This includes a level, tape measure, trowel, mortar mix, safety glasses, gloves, and a saw for cutting the stones. You will also need a concrete base, which can be poured directly onto the existing floor or built up using a pre-made concrete slab. For safety, it's crucial to consult local building codes and regulations for fire safety requirements in your area.
Laying the Foundation
Once you have the necessary materials and tools, you can start laying the foundation for your stone hearth. This involves creating a sturdy base that can support the weight of the stone and withstand the heat generated by the fireplace. Begin by cleaning the existing floor thoroughly and removing any debris or irregularities. If a concrete base is required, pour the concrete according to the manufacturer's instructions, ensuring it is level and has ample curing time.
For a more durable and aesthetically pleasing finish, consider adding a layer of mortar over the concrete base. Apply a thin layer of mortar to the concrete, ensuring it is spread evenly and level. This mortar layer will provide a secure and smooth surface for the stone tiles. Allow the mortar to dry completely before proceeding to the next step.
Installing the Stone
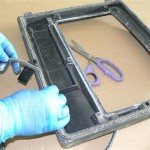
Now comes the exciting part - installing the stone tiles. Begin by measuring and cutting the stone pieces to fit the desired dimensions of the hearth. Using a mortar mix specifically designed for fireplaces, apply a generous layer of mortar to the back of each stone tile. Gently press the stone onto the prepared base, ensuring it is level and flush with the surrounding tiles.
As you lay each stone, use a level to ensure it is properly aligned. Tap the stone gently with a rubber mallet to secure it in place and remove any air bubbles from the mortar. Continue laying the stone tiles in a pattern that complements the design of your fireplace. For a more professional look, create grout lines between the stone tiles, filling the spaces with a grout mixture that matches the colour of the stone.
Finishing Touches
After the mortar has set and the grout has dried, you can apply a sealant to your new stone hearth. This will protect the stone from moisture, stains, and wear and tear. Apply the sealant according to the manufacturer's instructions, ensuring it is evenly distributed across the surface of the stone.
Once the sealant has dried, you can add finishing touches to your DIY stone hearth. This may include installing a fire screen, adding decorative accents, or incorporating other design elements that enhance the aesthetic appeal of your fireplace. Remember to maintain proper ventilation and consult local fire safety regulations for safe and responsible fireplace use.
Key Points for a Successful DIY Stone Hearth
Safety First
Prioritize safety when working with tools and materials. Wear safety glasses and gloves, and follow all manufacturer's instructions for handling building materials.
Measure Twice, Cut Once
Accurate measurements are crucial for achieving a well-proportioned and aesthetically pleasing hearth. Take your time and double-check your measurements before cutting any stone.
Patience and Consistency
Laying stone tiles requires patience and consistency. Ensure each stone is level and aligned with the surrounding tiles to create a smooth and durable finish.
A DIY stone hearth can transform your fireplace into a focal point of elegance and warmth. By following these steps and adhering to safety guidelines, you can create a beautiful and functional hearth that enhances the beauty and functionality of your home.

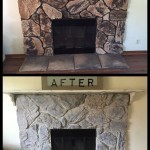
Diy Fireplace Makeover At Home With The Barkers

Diy Fireplace Hearth And Stacked Stone Wall Tile Newlywoodwards

Diy Fireplace Hearth And Stacked Stone Wall Tile Newlywoodwards

Diy Faux Cast Stone Fireplace Part 1 Demo And Tiling The Hearth Top Shelf

Diy Fireplace Hearth And Stacked Stone Wall Tile Newlywoodwards

How To Build And Hang A Mantel On Stone Fireplace Shanty 2 Chic

Thin Stone Veneers Make A Fireplace Update Easy Swenson Granite 100 Natural Stones

How To Build A Diy Stone Fireplace Hometalk

Make A Miniature Stone Hearth The Miss Thistle Society Ann Wood Handmade

Diy Fireplace Makeover At Home With The Barkers
Related Posts