How To Build A Fireplace Mantel With Crown Molding
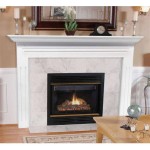
Fireplace mantels are a great way to add a touch of elegance and sophistication to any home. They can also help to frame the fireplace and make it the focal point of the room. If you're looking to add a mantel to your fireplace, crown molding is a great option. It's relatively easy to install and can give your mantel a polished, finished look.
Here are the steps on how to build a fireplace mantel with crown molding:
1. Measure and cut the wood
The first step is to measure and cut the wood for the mantel. The mantel will consist of three pieces: the header, the legs, and the crown molding. The header is the horizontal piece that will span the top of the fireplace opening. The legs are the vertical pieces that will support the header. And the crown molding is the decorative trim that will be attached to the top of the header.
To measure the header, measure the width of the fireplace opening and add 6 inches. This will give you the length of the header. The height of the header will depend on the size of the fireplace opening and the desired look. A good rule of thumb is to make the header about 1/3 the height of the fireplace opening.
To measure the legs, measure the height of the fireplace opening and add 6 inches. This will give you the length of the legs. The width of the legs will depend on the desired look. A good rule of thumb is to make the legs about 1/4 the width of the header.
To measure the crown molding, measure the length of the header and add 6 inches. This will give you the length of the crown molding. The width of the crown molding will depend on the desired look. A good rule of thumb is to make the crown molding about 1/3 the height of the header.
Once you have measured and cut the wood, you can assemble the mantel.
2. Assemble the mantel
To assemble the mantel, first attach the legs to the header using wood screws. Then, attach the crown molding to the top of the header using wood glue and nails.
Once the mantel is assembled, you can finish it by sanding it and applying a coat of paint or stain.
3. Install the mantel
The final step is to install the mantel. To do this, first measure and mark the location of the mantel on the wall above the fireplace. Then, use a level to make sure that the mantel is level. Once the mantel is level, you can attach it to the wall using wood screws.
And that's it! You've now successfully built and installed a fireplace mantel with crown molding.

Diy Mantel Update With Crown Molding Table And Hearth

Diy Mantel Update With Crown Molding Table And Hearth

Diy Mantel Update With Crown Molding Table And Hearth

Super Simple Mantel

Diy Mantel Update With Crown Molding Table And Hearth

Building Our Fireplace The Diy Mantel House Mommy

Diy Crown Molding Mantel Shelf Google Search Lareira

How To Build A Fireplace Mantel With Crown Molding

How To Build Fireplace Mantel 102 Part 5 Make The Hood Joy Of Moldings

Fireplace Mantle Crazy Easy Assembly
Related Posts

