Transforming Your Brick Fireplace with Stacked Stone
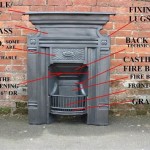
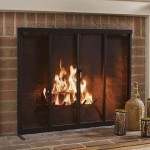
A brick fireplace, while often charming, can sometimes feel dated or clash with a desired aesthetic. One popular method of updating a brick fireplace is by applying stacked stone. This process involves adhering individual pieces of stone, typically thin stone veneer, to the brick surface, creating a textured and visually appealing façade. It's a project that can significantly alter the fireplace's appearance, adding warmth, character, and a touch of natural elegance to a living space.
This article will outline the process of applying stacked stone to a brick fireplace, offering guidance on preparation, material selection, installation, and considerations for ensuring a successful and lasting result. It is crucial to emphasize that while this project can be undertaken as a DIY endeavor, proper planning, adherence to safety precautions, and a meticulous approach are essential. For complex or large-scale fireplace transformations, consulting with a qualified professional is always recommended.
Preparation: Ensuring a Solid Foundation
The initial preparation phase is arguably the most critical for a successful stacked stone installation. A properly prepared surface ensures optimal adhesion and prevents future issues such as stone detachment or cracking. This stage primarily focuses on cleaning, assessing the existing brick, and creating a suitable bonding surface.
The first step is to thoroughly clean the brick fireplace. Over time, brick can accumulate soot, dust, grease, and other contaminants that can hinder adhesion. A wire brush can be used to scrub away loose debris. Following this, a solution of trisodium phosphate (TSP) diluted in water, according to the manufacturer's instructions, is an effective cleaning agent. TSP helps to remove grease and grime. It is crucial to wear appropriate protective gear, including gloves and eye protection, when working with TSP. After scrubbing with the TSP solution, rinse the brick thoroughly with clean water and allow it to dry completely.
Once the brick is clean, it's essential to inspect it for any structural issues. Cracks, loose bricks, or crumbling mortar joints need to be addressed before proceeding. Small cracks can often be filled with a suitable masonry crack filler. Loose bricks should be re-mortared using a compatible mortar mix. If the damage is extensive, it is advisable to consult with a mason to evaluate the structural integrity of the fireplace. Ignoring these issues can compromise the stability of the stacked stone installation and potentially pose a safety hazard.
The final step in preparation is creating a suitable bonding surface. Brick, while porous, may not always provide the optimal texture for mortar adhesion. Applying a scratch coat can significantly improve bonding. A scratch coat is a thin layer of modified thin-set mortar that is applied to the brick surface and then scratched with a notched trowel to create grooves. These grooves provide a mechanical key for the subsequent layer of mortar used to adhere the stacked stone. Choose a modified thin-set mortar specifically designed for use with stone veneer. Apply the scratch coat evenly over the brick surface, ensuring that all areas are covered. Allow the scratch coat to cure for the time specified by the mortar manufacturer, typically 24 to 48 hours, before proceeding with the stone installation.
Material Selection: Choosing the Right Stone
Selecting the appropriate stacked stone is crucial not only for achieving the desired aesthetic but also for ensuring compatibility with the fireplace's environment and the chosen installation method. Stacked stone comes in a variety of materials, colors, textures, and sizes, offering numerous design possibilities. However, not all types of stacked stone are suitable for all applications.
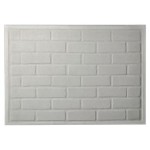
Thin stone veneer is the most common choice for fireplace applications due to its relatively lightweight nature and ease of installation. Thin stone veneer is typically made from natural stone that has been cut into thin pieces, or from manufactured stone, which is a concrete-based product designed to mimic the appearance of natural stone. Natural stone offers a unique and authentic look, while manufactured stone provides greater consistency in color and texture and can often be more cost-effective.
When selecting stacked stone, consider the overall style of the room and the desired effect. For a rustic look, natural stone with irregular shapes and textures is a good choice. For a more contemporary look, manufactured stone with clean lines and consistent coloring may be more suitable. Consider the color palette of the room and choose a stone that complements the existing décor. Hold samples of the stone up against the brick fireplace and observe them in different lighting conditions to get a better sense of how they will look in the space.
Before purchasing the stone, accurately measure the surface area of the fireplace that you intend to cover. Add a percentage, typically 10-15%, to account for cuts, waste, and potential breakage. It's always better to have a little extra stone on hand than to run short during the installation process.
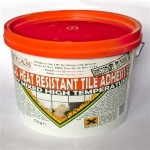
In addition to the stacked stone itself, you will also need to select the appropriate mortar. Choose a modified thin-set mortar specifically designed for use with stone veneer and that is suitable for the environmental conditions of the fireplace. Some mortars are formulated for interior use only, while others are suitable for both interior and exterior applications. Ensure that the mortar is compatible with the type of stone you have selected. Colored mortar can also be used to create different visual effects, such as highlighting the texture of the stone or creating a contrasting grout line.
Installation: Adhering the Stone
The installation process involves applying the mortar to the back of the stone and then pressing it firmly onto the prepared brick surface. Precision and attention to detail are key to achieving a professional-looking result that is both aesthetically pleasing and structurally sound.
Begin by dry-fitting the stones. Lay out the stones on the floor in the desired pattern and arrangement. This allows you to visualize the final result and make any necessary adjustments before adhering the stones to the fireplace. Pay attention to the shape, size, and color variations of the stones and arrange them in a way that creates a balanced and visually appealing pattern. Consider staggering the joints between the stones to create a more natural look. Mark the position of the stones on the brick fireplace with a pencil to guide the installation process.
Mix the modified thin-set mortar according to the manufacturer's instructions. Use a clean mixing container and a drill with a mixing paddle to ensure a smooth and consistent mixture. Add water gradually until the mortar reaches a thick, creamy consistency. Allow the mortar to slake for the time specified by the manufacturer, typically 5-10 minutes, and then remix it before use.
Apply a layer of mortar to the back of each stone using a notched trowel. The depth of the mortar should be sufficient to create a strong bond with the brick surface, typically around 1/4 to 3/8 inches. Be sure to cover the entire back of the stone with mortar, paying particular attention to the edges. Press the stone firmly onto the prepared brick surface, aligning it with the pencil marks. Wiggle the stone slightly to ensure good contact with the scratch coat. Remove any excess mortar that squeezes out from between the stones with a margin trowel.
Work in small sections, applying mortar to only a few stones at a time. This prevents the mortar from drying out before the stones are adhered. Use a level to ensure that the stones are installed straight and plumb. As you install each stone, check its alignment with the adjacent stones. Use shims if necessary to maintain consistent spacing between the stones. Different styles involve different jointing so ensure you are following your chosen style. Some prefer a dry-stacked look where the stones are tightly butted together, while others prefer a more traditional look with visible mortar joints.
After installing all of the stones, allow the mortar to cure for the time specified by the manufacturer, typically 24 to 48 hours, before applying any grout or sealant. Once the mortar is fully cured, inspect the installation for any gaps or cracks. Fill any gaps or cracks with mortar or a suitable sealant. Clean the surface of the stones with a damp sponge to remove any excess mortar or dust. A final sealant can be applied to the stone to protect it from staining and moisture damage. Choose a sealant that is specifically designed for use with stone veneer and that is compatible with the type of stone you have selected.

Faux Stone Fireplace Surround Over Old Brick Genstone

How To Cover A Brick Fireplace With Stone

Thin Stone Veneers Make A Fireplace Update Easy

Thin Stone Veneers Make A Fireplace Update Easy

Diy Stacked Stone Fireplaces On A Budget Msi Blog

Reface A Fireplace With The Look Of Stone Or Brick Barron Designs

12 Stacked Stone Fireplace Ideas For Optimal Coziness

How To Build An Outdoor Stacked Stone Fireplace

Manufactured Stone Veneer That I Installed In Dry Stack Over A Drab Brick Fireplace

Faux Stone Panels For Your Fireplace Makeover