How To Turn On a Gas Fireplace With an Ignitor
Gas fireplaces offer a convenient and aesthetically pleasing alternative to traditional wood-burning fireplaces. They provide instant warmth and create a cozy ambiance with the simple flick of a switch or the press of a button. A crucial component in starting many gas fireplaces is the ignitor, which provides the spark needed to ignite the gas and produce a flame. This article provides a comprehensive guide on how to safely and effectively turn on a gas fireplace equipped with an ignitor system.
Before initiating the lighting procedure, it is imperative to understand the basic components and safety considerations associated with gas fireplaces. The primary components include the gas valve, which controls the flow of natural gas or propane to the burner; the burner itself, where the gas mixes with air and combustion occurs; the ignitor, which generates the spark; the pilot light assembly (if applicable), which provides a small, continuous flame to ignite the main burner; and the control panel, which houses the on/off switch or buttons.
Safety is paramount when dealing with gas appliances. Regular inspection and maintenance are crucial to prevent gas leaks and ensure proper functioning. It is recommended to have your gas fireplace professionally inspected annually by a qualified technician. This inspection should include checking for gas leaks, cleaning the burner and pilot light assembly, and verifying the proper operation of the ignitor and other components. Furthermore, ensure that smoke detectors and carbon monoxide detectors are installed and functioning correctly in the vicinity of the fireplace.
Step 1: Preparing the Fireplace for Ignition
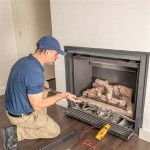
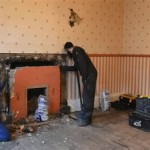
Prior to attempting to ignite the gas fireplace, a thorough preparation process is essential. This process involves several steps, and adherence to each step is crucial for a safe and successful ignition. The initial step involves visually inspecting the fireplace for any obstructions or debris. Remove any objects that may be blocking the burner or the airflow vents. This includes logs, decorative items, or any accumulated dust or dirt. A clean fireplace ensures proper combustion and reduces the risk of a malfunction.
The next critical step involves locating and identifying the gas shut-off valve. This valve controls the gas supply to the fireplace and is typically located near the fireplace or in an adjacent room. Familiarizing yourself with the location of this valve is crucial in case of an emergency, such as a gas leak. Ensure that the valve is in the "on" position before proceeding. If the valve is in the "off" position, carefully turn it to the "on" position, following the manufacturer's instructions. Avoid overtightening the valve, as this could damage the mechanism.
If your gas fireplace is equipped with a glass door, ensure that it is properly closed. This will help contain the flame and prevent drafts from affecting the combustion process. Closing the glass door also improves the overall efficiency of the fireplace. However, some older models may require the glass door to be slightly ajar during ignition to allow for adequate airflow. Consult the owner's manual for specific instructions regarding the glass door.
Before initiating the ignition sequence, it is advisable to ventilate the room. Open a window or door to allow fresh air to circulate. This will help to dispel any accumulated gas odors and ensure adequate oxygen supply for combustion. A well-ventilated room also reduces the risk of carbon monoxide buildup.
Finally, carefully review the owner's manual for your specific gas fireplace model. The manual will provide detailed instructions and safety precautions specific to your unit. Familiarizing yourself with the manual will ensure that you are following the correct procedure and avoiding any potential hazards. Pay close attention to any warnings or cautions provided in the manual.
Step 2: Initiating the Ignition Sequence
Once the fireplace has been properly prepared, the ignition sequence can be initiated. The specific steps may vary slightly depending on the model of your fireplace, but the general procedure remains consistent. The first step typically involves locating the ignitor button or switch. This button or switch is usually located on the control panel of the fireplace, often accompanied by a symbol of a flame or a spark.
Before pressing the ignitor button, it is crucial to locate the gas valve knob. This knob controls the flow of gas to the pilot light or main burner. In some models, the knob may have an "on," "off," and "pilot" setting. If your fireplace has a pilot light, turn the knob to the "pilot" setting and depress it. While holding the knob in the depressed position, press the ignitor button repeatedly. This will generate a spark that should ignite the pilot light.
If the pilot light fails to ignite after several attempts, release the gas valve knob and wait for a few minutes to allow any accumulated gas to dissipate. This waiting period is crucial to prevent a potential explosion. After waiting, repeat the process of depressing the gas valve knob and pressing the ignitor button. If the pilot light still fails to ignite, consult the troubleshooting section of the owner's manual or contact a qualified technician.
Once the pilot light is successfully ignited, continue holding the gas valve knob in the depressed position for approximately 20-30 seconds. This allows the thermocouple, a heat-sensitive device, to warm up and maintain the gas flow to the pilot light. After 20-30 seconds, slowly release the gas valve knob. The pilot light should remain lit. If the pilot light goes out after releasing the knob, repeat the ignition sequence, ensuring that you hold the knob in the depressed position for a longer duration.
With the pilot light established, the next step involves turning on the main burner. This is typically accomplished by turning the gas valve knob to the "on" position. In some models, there may be a separate switch or button to activate the main burner. Once the main burner is activated, the flame should ignite and the fireplace will begin to produce heat. Adjust the flame height to your desired level using the control panel.
Step 3: Troubleshooting Common Ignition Issues
Despite following the correct procedure, it is possible to encounter issues during the ignition process. Common problems include a malfunctioning ignitor, a clogged pilot light orifice, or a faulty thermocouple. Recognizing and addressing these issues is crucial for maintaining the proper functioning of your gas fireplace.
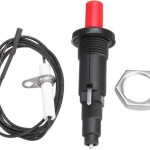
If the ignitor fails to produce a spark, the first step is to check the power supply. Ensure that the fireplace is properly plugged into an electrical outlet and that the circuit breaker is not tripped. If the ignitor is battery-powered, replace the batteries with fresh ones. If the ignitor still fails to spark after checking the power supply, it may be necessary to replace the ignitor itself. Ignitors are relatively inexpensive and can be easily replaced with basic tools. Consult the owner's manual for specific instructions on replacing the ignitor.
A clogged pilot light orifice can prevent the pilot light from igniting or cause it to burn with a weak or unstable flame. To clean the orifice, first turn off the gas supply to the fireplace at the shut-off valve. Allow the fireplace to cool completely before attempting to clean the orifice. Use a small, stiff wire or a specialized pilot light cleaning tool to gently clear any debris from the orifice. Avoid using excessive force, as this could damage the orifice. After cleaning the orifice, turn the gas supply back on and attempt to ignite the pilot light.
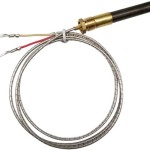
A faulty thermocouple can cause the pilot light to extinguish after releasing the gas valve knob. The thermocouple is a heat-sensitive device that generates a small electrical current that keeps the gas valve open. If the thermocouple is not generating sufficient current, the gas valve will close and the pilot light will go out. To test the thermocouple, use a multimeter to measure the voltage output while the pilot light is lit. If the voltage is below the specified level, the thermocouple needs to be replaced. Replacing the thermocouple is a relatively straightforward procedure, but it is advisable to consult a qualified technician if you are not comfortable performing the repair yourself.
In addition to these common issues, other potential problems include a clogged burner, a faulty gas valve, or a gas leak. If you suspect a gas leak, immediately turn off the gas supply at the shut-off valve and evacuate the premises. Contact your local gas company or a qualified technician to inspect and repair the leak. Do not attempt to repair a gas leak yourself, as this could be extremely dangerous.
Regular maintenance and prompt attention to any issues will ensure the safe and reliable operation of your gas fireplace. By following the steps outlined in this article and consulting your owner's manual, you can confidently and effectively turn on your gas fireplace with an ignitor and enjoy the warmth and ambiance it provides.

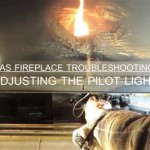
How To Light The Pilot On A Gas Fireplace

How To Relight A Millivolt Valve Gas Fireplace Pilot Light Tophat Pro

How To Light Start A Gas Fireplace Using Real Example

Gas Fireplace Repair Won T Work Start Or Light Piezo Ignitor Spark Igniter

How To Light The Pilot With A Direct Spark Ignition System

My Gas Fireplace Pilot Light Works Perfectly However When I Flip The Switch For Rest Of To Turn On Nothing Happens What Quora

How Electronic Ignition Ipi Fireplaces Work

Why Your Gas Fireplace Won T Light And How To Fix It

Electronic Ignition

Gas Fireplace Won T Stay Lit Magic Touch Mechanical
Related Posts