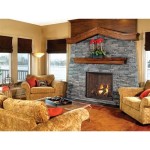
DIY Fireplace Hearth Pad: Enhance Your Fireplace's Style and Protection
A fireplace hearth pad is an essential component of any fireplace setup. It serves both aesthetic and functional purposes, adding a decorative touch while safeguarding the floor beneath your fireplace. While pre-made hearth pads are readily available, crafting your own DIY fireplace hearth pad can be a rewarding project, allowing you to personalize its style and create a unique focal point for your living space.
This guide explores the process of designing and constructing a DIY fireplace hearth pad. It provides insights into materials, design considerations, and step-by-step instructions. By exploring available resources and utilizing creative techniques, you can successfully build a custom fireplace hearth pad that complements your home's décor.
Choosing the Right Materials for Your DIY Fireplace Hearth Pad
The first step in creating a DIY fireplace hearth pad is selecting the right materials. Various options are readily available, each offering distinct advantages in terms of durability, aesthetics, and ease of installation.
Popular choices for fireplace hearth pads include:
- Stone: Natural stone, such as slate, marble, or granite, adds elegance and durability to any fireplace. It's heat-resistant and visually appealing. However, stone is heavier and requires professional installation if you're working with large slabs.
- Tile: Ceramic or porcelain tiles offer a wide range of styles, colors, and patterns, making them versatile for any fireplace design. They are relatively easy to install, affordable, and can withstand the heat from a fireplace.
- Brick: Brick provides a rustic and traditional look for fireplaces. It's durable and fire-resistant but can be heavier than other materials. Brick pavers offer an ideal option for creating a DIY hearth pad, as they are readily available and relatively lightweight.
- Concrete: Concrete is an extremely durable and cost-effective material. However, it requires more technical expertise for installation and may not be as aesthetically appealing as other options.
- Wood: Wood is a natural material that can add warmth and character to your fireplace. However, it's important to select heat-resistant woods like slate or oak and seal them properly to prevent damage from heat and moisture.
When selecting materials, consider factors such as the style of your fireplace, the overall aesthetic of your room, and your budget. You also need to ensure that the chosen material can withstand the heat generated by your fireplace and the weight it will bear.
Designing Your DIY Fireplace Hearth Pad
Once you've chosen your materials, it's time to design your DIY fireplace hearth pad. This involves deciding on the size, shape, and style of your hearth pad.
Consider the following factors when designing:
- Size: The size of your hearth pad should be large enough to accommodate the fireplace opening and provide sufficient space for furniture placement.
- Shape: The shape of your hearth pad can be rectangular, square, or even curved, depending on the design of your fireplace.
- Style: The style of your hearth pad should complement the overall design of your fireplace and the room.
- Functionality: Consider the functional needs of your hearth pad. You may need a spacious area to store firewood or house a seating area.
Sketching out your design on paper or using computer-aided design (CAD) software will allow you to visualize your hearth pad and make necessary adjustments before you start building.
Constructing Your DIY Fireplace Hearth Pad
After finalizing your design, you can start constructing your DIY fireplace hearth pad. The construction process will depend on the chosen material and your skill level. However, common steps include:
- Prepare the Subfloor: Clean and level the subfloor where the hearth pad will be installed.
- Install a Base: If using stone, tile, or brick, you may need to install a base layer of concrete or mortar to create a solid and level foundation.
- Lay the Materials: Begin laying your chosen material. This process involves following the design you created, ensuring proper spacing and alignment.
- Grout and Seal: For tile or brick, grouting the spaces between the materials adds stability and enhances the aesthetic appeal. Sealing the hearth pad protects it from stains and moisture damage.
Remember to wear protective gear like gloves and safety glasses when working with tools and materials. Always refer to the manufacturer's instructions for specific details about installing your chosen materials.

Diy Hearth Pad Farmhouse On Boone

Diy Hearth Pad Farmhouse On Boone

Diy Hearth Pad Farmhouse On Boone

Diy Hearth Pad Farmhouse On Boone

Diy Hearth Pad Final Wood Stove Pads

Diy Hearth Pad Farmhouse On Boone

Diy Hearth Pad For Wood Stove Pads Fireplace

Drastic Hearth Makeover Diy Wood Stove Pad

How To Baby Proof A Fireplace Diy Hearth Cushion Simply September

How To Build A Brick Hearth For Wood Stove If Only April
Related Posts


