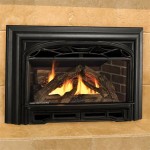
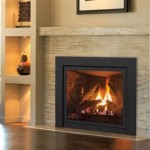
DIY Cement Fireplace Hearth: A Comprehensive Guide
A fireplace hearth serves as a crucial safety feature, providing a non-combustible buffer between the fireplace and the surrounding flooring. It also offers an aesthetic element, complementing the fireplace design and enhancing the overall ambiance of the living space. While professionally installed hearths can be expensive, creating a cement fireplace hearth as a do-it-yourself project offers a cost-effective and customizable alternative. This article provides a comprehensive guide to constructing a durable and visually appealing cement fireplace hearth.
Planning and Preparation: Laying the Foundation for Success
Prior to embarking on the cement hearth project, meticulous planning and preparation are paramount. A well-defined plan ensures a smooth construction process and minimizes potential errors. The initial step involves accurately measuring the dimensions of the existing fireplace opening and determining the desired size and shape of the new hearth. The hearth should extend at least 16 inches beyond the front of the fireplace opening and 8 inches beyond each side, conforming to most building codes. However, local building codes should be consulted to confirm specific requirements relevant to the area.
Once the dimensions are established, create a detailed sketch or blueprint of the hearth. This visual representation serves as a guide throughout the construction process. Consider the desired thickness of the cement slab, typically ranging from 2 to 4 inches. A thicker slab provides greater durability and heat resistance. Decide on the shape of the hearth, whether it's a simple rectangle, a curved design, or a more intricate geometric form. The design should complement the existing fireplace and the overall aesthetic of the room.
Regarding materials, gather all necessary supplies before commencing the construction. The essential materials include: Portland cement, sand, gravel (or a pre-mixed concrete mix), water, a formwork material (such as plywood or melamine), reinforcing mesh or rebar, mixing tools (wheelbarrow, shovel, and hoe or a concrete mixer), finishing tools (trowel, edger, and float), safety equipment (gloves, safety glasses, and dust mask), and a concrete sealer.
The formwork is crucial for shaping the wet cement. Plywood is a common choice, but melamine provides a smoother surface for easy removal after the cement has cured. Reinforcing mesh or rebar adds strength and prevents cracking. The mixing tools depend on the size of the project; for smaller hearths, manual mixing in a wheelbarrow may suffice, while larger projects benefit from a concrete mixer. The finishing tools create a smooth and professional surface. Safety equipment is indispensable for protecting against dust, splashes, and potential injuries. Finally, a concrete sealer protects the finished hearth from stains, moisture, and wear.
Prepare the subfloor where the hearth will be placed. Ensure it is level, clean, and structurally sound. If the existing flooring is combustible, such as wood or carpet, remove it completely. A concrete backer board can be installed as an additional non-combustible layer beneath the cement hearth. This is particularly important for fireplaces that generate significant heat. Clean the subfloor thoroughly to remove any debris, dust, or grease that could interfere with the adhesion of the cement.
Mixing and Pouring the Cement: Crafting a Solid Foundation
The next critical step involves mixing the cement to the correct consistency. The ideal cement mixture should be workable but not too watery. Follow the manufacturer's instructions on the cement bag for the proper ratio of cement, sand, gravel, and water. A typical mix ratio is 1 part Portland cement, 2 parts sand, and 3 parts gravel. Add water gradually, mixing continuously until the desired consistency is achieved. Avoid adding too much water, as this can weaken the final product.
When mixing manually in a wheelbarrow, combine the dry ingredients first, then gradually add water while mixing with a shovel or hoe. Ensure the mixture is homogenous, with no dry pockets of cement. For larger projects using a concrete mixer, load the ingredients in the recommended order and mix for the specified time to achieve a uniform consistency.
Once the cement is mixed, carefully pour it into the prepared formwork. Pour the cement in layers, starting from one corner and working your way across. Vibrate or tap the formwork to release any trapped air bubbles and ensure the cement fills all corners and edges. Use a shovel or trowel to distribute the cement evenly within the formwork.
Before the cement hardens, embed the reinforcing mesh or rebar within the wet cement. This reinforcement provides added strength and helps prevent cracking. Place the mesh or rebar in the middle of the cement slab, ensuring it is fully encased by the cement. The reinforcement should be cut to fit within the formwork and secured in place to prevent it from shifting during the pouring process.
Level the surface of the wet cement using a screed board or a long, straight piece of wood. Drag the screed board across the top of the formwork, removing any excess cement and creating a smooth, level surface. Fill in any low spots with additional cement and repeat the screeding process until the surface is perfectly level. This step is crucial for ensuring a uniform and aesthetically pleasing hearth.
Finishing and Curing: Achieving a Professional Finish
After screeding, allow the cement to set for a short period, typically 1-2 hours, or until it becomes firm enough to walk on without leaving deep footprints. This is the ideal time to begin the finishing process. Use a trowel to smooth the surface of the cement, removing any imperfections and creating a polished look. An edger can be used to round the edges of the hearth, preventing chipping and creating a more refined appearance. A float can be used to further smooth the surface and create a uniform texture.
Different finishing techniques can be employed to achieve various aesthetic effects. A smooth trowel finish provides a sleek and modern look, while a textured finish, created with a broom or sponge, adds character and visual interest. Experiment with different techniques to find the desired look that complements the fireplace and the overall decor.
Curing is the process of maintaining the moisture content of the cement during the hardening process. This is essential for achieving maximum strength and durability. The cement should be kept moist for at least 7 days, but ideally for 28 days. This can be achieved by regularly spraying the surface with water, covering it with plastic sheeting, or using wet burlap. Avoid allowing the cement to dry out too quickly, as this can lead to cracking and weakening.
After the curing period, remove the formwork carefully. If the formwork is difficult to remove, gently tap it with a hammer to loosen it. Once the formwork is removed, inspect the hearth for any imperfections. Minor imperfections can be repaired with a cement patching compound. Allow the patching compound to dry completely before proceeding.
The final step involves applying a concrete sealer to protect the hearth from stains, moisture, and wear. Choose a high-quality concrete sealer that is specifically designed for fireplace hearths. Apply the sealer according to the manufacturer's instructions, typically using a brush or roller. Allow the sealer to dry completely before placing any items on the hearth or using the fireplace.
Regular maintenance is essential for preserving the appearance and longevity of the cement fireplace hearth. Clean the hearth regularly with a mild detergent and water. Avoid using harsh chemicals or abrasive cleaners, as these can damage the sealer and the cement surface. Promptly clean up any spills to prevent staining. Reapply the concrete sealer every 1-2 years, or as needed, to maintain its protective properties.
When using the fireplace, always follow safety precautions. Keep flammable materials away from the hearth and never leave a fire unattended. Regular inspections of the fireplace and hearth can help identify any potential problems before they escalate. By following these guidelines, a DIY cement fireplace hearth can provide years of safe and aesthetically pleasing enjoyment.

Updating Fireplace Hearth No Demolition Required Single Girl S Diy

Diy Faux Cast Stone Fireplace Part 1 Demo And Tiling The Hearth Top Shelf

How To Build A Concrete Fireplace Hearth

Diy Concrete Fireplace Makeover Before After Cherished Bliss

Gfrc Floating Concrete Hearth For Wood Fireplace 7 Steps With S Instructables

Diy Concrete Cement Fireplace Sarah Sherman Samuel

Diy Diaries How To Create A Concrete Fireplace Hearth

Diy Fireplace Hearth And Stacked Stone Wall Tile Newlywoodwards

How To Paint A Concrete Fireplace Hearth Look Like Stone Wood Stove

How Can I Perk Up A Concrete Hearth Hometalk
Related Posts