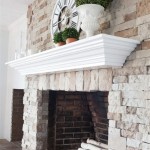
Creating a Corner Fireplace Mantel: A DIY Guide
Corner fireplaces are a unique and captivating addition to any living space. They offer a focal point that draws the eye and can be used to create a cozy and inviting atmosphere. A mantel above a corner fireplace not only enhances its aesthetic appeal but also provides valuable storage and display space. Building a corner fireplace mantel is a rewarding DIY project that can be customized to suit your personal style.
This article will guide you through the process of constructing a corner fireplace mantel. We will delve into essential materials, tools, and techniques, providing step-by-step instructions to ensure a successful outcome.
Planning and Design
Before embarking on your mantel project, careful planning and design considerations are crucial. Determine the desired dimensions of your mantel, taking into account the size and shape of your fireplace and the surrounding walls. Consider the style of your home and the overall decor to choose a design that complements the existing aesthetic.
Sketch out your ideas, noting the height, width, and depth of the mantel. Determine the materials you will utilize. Wood is a popular choice for its versatility and aesthetic appeal. Other options include manufactured wood, metal, or even stone. Remember to factor in the weight of the materials and ensure the structure can adequately support it.
Materials and Tools
Once you have finalized your design, gather the necessary materials and tools. These may include:
Materials:
- Wood for the mantel structure (consider sturdy hardwoods like oak or maple)
- Mantel Shelf (choose a material that complements the mantel construction)
- Wood glue
- Screws or nails
- Finish (e.g., paint, stain, varnish)
- Hardware (e.g., brackets, hinges, molding)
Tools:
- Saw (circular saw, miter saw, or hand saw)
- Drill and drill bits
- Measuring tape and level
- Clamps
- Sandpaper (different grits)
- Hammer
- Safety glasses and gloves
Construction Process
With your materials and tools gathered, you can begin constructing your corner fireplace mantel. Here's a step-by-step guide:
- Cut the mantel pieces: Using your saw, accurately cut the wood to the dimensions you planned. Ensure all cuts are clean and precise.
- Assemble the mantel frame: Join the pieces using wood glue and screws or nails, ensuring a secure and sturdy structure. Clamps can help maintain alignment during assembly.
- Attach the shelf: Install shelf brackets or supports onto the mantel frame, ensuring they can adequately support the weight of your chosen shelf.
- Install the mantel: Securely attach the mantel to the wall above your fireplace. Use appropriate mounting hardware and make sure the mantel is level.
- Finishing touches: Sand the entire surface of the mantel to create a smooth finish. Apply your chosen finish, such as paint, stain, or varnish. This will protect the wood and enhance its aesthetic appeal.
- Install hardware: Add any desired hardware, such as decorative molding, brackets, or hinges. This will enhance the mantel's appearance and functionality.
Tips and Considerations
Here are some additional tips and considerations to keep in mind when building your corner fireplace mantel:
- Safety first: Wear safety glasses and gloves throughout the project. Ensure your workspace is well-lit and free from clutter.
- Measure twice, cut once: Accuracy is key to a successful project. Double-check all your measurements before cutting wood.
- Pre-drill holes: To prevent wood from splitting when driving screws, pre-drill pilot holes slightly smaller than the screw diameter.
- Consider existing features: If your fireplace already has a built-in mantel, you can integrate the new mantel into the existing structure.
- Customize your design: Utilize decorative elements, such as corbels, molding, or a decorative shelf, to enhance your mantel's aesthetic appeal.
Building a corner fireplace mantel is a rewarding DIY project that can transform your living space. By following these steps and incorporating your personal style, you can create a focal point that adds warmth, beauty, and functionality to your home.

Diy Mantel Tutorial Taryn Whiteaker Designs

How To Make A Corner Fireplace Mantel Look Good 15 Examples

How To Decorate A Corner Fireplace Mantel For The Holidays Making It In Mountains

How To Build A Faux Diy Corner Fireplace With German Schmear Brick Treatment This Life

Diy How To Build A Simple Corner Fireplace Gas Decor Mantels

How To Make A Corner Fireplace Mantel Look Good 15 Examples

Diy Fireplace Makeover Home Corner

Corner Electric Fireplace Build Start To Finish Aspenackley

How To Transform A Corner Fireplace Thrifty Decor Diy And Organizing

Diy How To Build A Simple Corner Fireplace Dengarden
Related Posts


