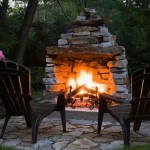
How to Craft a Rustic Fireplace Mantel and Surround
A rustic fireplace makes a captivating centerpiece, adding warmth and character to any living space. Completing it with a handcrafted mantel and surround elevates its aesthetics and creates a cozy ambiance. Whether you prefer reclaimed wood or weathered stone, follow these steps to build a rustic fireplace mantel and surround that reflects your personal style and enhances the charm of your home.
Materials and Tools
For the Mantel:
- Reclaimed barn wood or other aged wood in desired length
- Brad nails
- Wood glue
- Finish nails
For the Surround:
- Reclaimed stone or brick (quantity depends on size of surround)
- Mortar mix
- Trowel
- Level
Tools:
- Nail gun
- Measuring tape
- Level
- Sander (optional)
- Grinder or chisel (optional)
Creating the Mantel
Step 1: Measure and Cut: Determine the desired size and shape of the mantel. Measure the fireplace opening and add 6-8 inches on either side for overhang. Cut the wood to the specified dimensions.
Step 2: Assemble: Apply wood glue to the edges of the wood pieces and clamp them together. Secure with brad nails using a nail gun. Reinforce the joints with finish nails.
Step 3: Finish: For a rustic look, leave the wood unfinished or apply a light stain or polyurethane. If desired, sand the wood to smooth any rough edges.
Building the Surround
Step 1: Prepare the Stones: If using reclaimed stone, clean it thoroughly with water and a wire brush. If necessary, use a grinder or chisel to shape the stones for a more uniform appearance.
Step 2: Mix Mortar: Mix the mortar according to the manufacturer's instructions. Create a consistency that is workable but not too runny.
Step 3: Install First Layer: Starting at one corner, apply a layer of mortar to the fireplace and set the stones in place. Use a level to ensure they are level and straight. Press the stones firmly into the mortar, aligning them carefully.
Step 4: Continue Laying: Continue laying rows of stones in this manner, applying mortar between each layer. Use the level to ensure each row is straight and the surround slopes slightly backward for drainage.
Step 5: Grout: Once the mortar has set, mix and apply grout to the joints between the stones. Use a damp sponge to smooth the grout and remove excess.
Step 6: Finish: To seal the surround, apply a stone sealant or water repellent. This will protect against moisture and staining.
Installing the Mantel
Step 1: Position the Mantel: Place the mantel on the fireplace surround at the desired height. Use a level to ensure it is level and centered.
Step 2: Secure the Mantel: Drive screws or nails through the mantel into the wall to secure it firmly. Make sure the screws are long enough to penetrate into the studs.
Step 3: Conceal Hardware: If desired, conceal the screws or nails by filling the holes with wood filler and staining or painting to match the mantel.
Enjoy Your Rustic Masterpiece
With these steps, you have created a beautiful and rustic fireplace mantel and surround that will enhance the ambiance of your living space for years to come. It's a versatile addition that can complement any décor style and become a focal point for gatherings and cozy evenings by the fire.

Diy Rustic Fireplace Mantel The Cure For A Boring
:max_bytes(150000):strip_icc()/sandandsisal-bdc76ad938a44d28ae9e23ef6c9fa331.jpg?strip=all)
17 Diy Fireplace Mantel Plans

Diy Fireplace Mantel And Surround Jenna Kate At Home

How To Build And Hang A Mantel On Stone Fireplace Shanty 2 Chic

How To Create A Diy Reclaimed Wood Fireplace Surround For Less Than 100 Grand Rapids Interior Design Fuchsia
:max_bytes(150000):strip_icc()/ablossominglife-4151b41015a64193a437e981c3aad037.jpg?strip=all)
17 Diy Fireplace Mantel Plans

10 Rustic Fireplace Mantel Ideas Blog Red Door

Diy Wood Beam Mantel

Diy Wood Beam Mantel

Diy Rustic Fireplace Mantel The Cure For A Boring Story Lovely Etc
Related Posts

