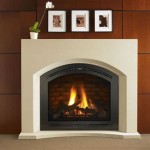
How to Paint a Fireplace Insert: A Comprehensive Guide
Painting a fireplace insert can dramatically improve the aesthetic appeal of a living space. Over time, the finish on these metal inserts can become worn, faded, or simply outdated. A fresh coat of high-temperature paint can revitalize the insert, making it appear newer and more integrated with the surrounding décor. The process, however, requires careful preparation, the selection of appropriate materials, and a meticulous application technique to ensure a durable and visually appealing finish.
Before commencing the project, it is crucial to understand the specific type of fireplace insert being painted. Inserts often come in various materials, including cast iron, steel, and other alloys. Identifying the material is essential for selecting the correct primer and paint. Furthermore, the insert's functionality needs to be considered. If the insert is actively used for heating, the paint must withstand high temperatures without chipping, peeling, or emitting harmful fumes. Neglecting these initial considerations can result in a substandard finish and potentially hazardous conditions.
This article will outline the necessary steps involved in painting a fireplace insert, covering everything from preparation and material selection to application and curing. Following these guidelines will contribute to a successful and long-lasting finish that enhances the overall appearance of the fireplace area.
Key Point 1: Preparation is Paramount
Proper preparation is the foundational element for any successful painting project, and this is especially true when dealing with high-temperature surfaces like fireplace inserts. Insufficient preparation can lead to poor adhesion, inconsistent coverage, and premature failure of the paint. This includes thoroughly cleaning the insert, removing any rust or loose paint, and masking off surrounding areas to protect them from overspray.
The first step is to thoroughly clean the fireplace insert. Accumulated soot, dust, and grime can prevent the paint from adhering properly. Use a wire brush, a scraper, and a heavy-duty cleaner specifically designed for removing soot and grease. Ensure the entire surface is free from any contaminants. Pay particular attention to corners and crevices where debris tends to accumulate.
Once cleaned, inspect the insert for any signs of rust or loose paint. Rust can spread beneath the new paint layer, causing it to bubble and peel. Use a wire brush, sandpaper, or a rust remover to eliminate all traces of rust. For loose paint, scrape away any flaking or peeling areas until you reach a stable surface. Feather the edges of the remaining paint to create a smooth transition between the old and new layers.
After addressing rust and loose paint, sand the entire surface of the insert. Sanding creates a slightly roughened surface that provides a better grip for the primer and paint. Use a medium-grit sandpaper (around 120-grit) for initial sanding, followed by a finer-grit sandpaper (around 220-grit) to smooth out any scratches. Wipe down the insert with a tack cloth to remove any sanding dust.
Masking off the surrounding areas is crucial to protect the fireplace surround, walls, and flooring from paint splatters and overspray. Use painter's tape and drop cloths to create a clean and defined painting area. Pay close attention to edges and corners, ensuring a tight seal to prevent paint from seeping through. Remove any surrounding furniture or cover it with plastic sheeting to safeguard it from accidental damage.
Before proceeding to the next step, ensure the insert is completely dry after cleaning and sanding. Moisture can interfere with the paint's adhesion and potentially cause corrosion. Allow sufficient drying time, especially in humid environments. Consider using a dehumidifier to accelerate the drying process if necessary.
Key Point 2: Selecting the Right Materials
Choosing the correct primer and paint is critical for achieving a durable and aesthetically pleasing finish on a fireplace insert. Ordinary paints are not designed to withstand the high temperatures generated by a working fireplace and may blister, crack, or emit harmful fumes when heated. Therefore, high-temperature paints specifically formulated for use on stoves, grills, and other heat-generating appliances must be used.
Primer serves as an intermediary layer between the bare metal of the fireplace insert and the topcoat of paint. It promotes adhesion, prevents rust from re-emerging, and provides a uniform surface for the paint to bond to. When selecting a primer, ensure it is compatible with both the metal substrate of the insert and the high-temperature paint chosen. Look for primers specifically labeled for high-heat applications.
High-temperature paints are typically available in aerosol cans or liquid form. Aerosol cans are convenient for smaller projects and intricate areas, while liquid paints are better suited for larger surfaces that can be sprayed or brushed. Regardless of the form, it is imperative to choose a paint that is rated for the maximum temperature the fireplace insert is expected to reach. Most high-temperature paints are rated for temperatures ranging from 500°F to 1200°F. Consult the manufacturer's specifications for your specific fireplace insert to determine the appropriate temperature rating.
In addition to temperature resistance, consider the finish and color of the paint. High-temperature paints are available in a variety of finishes, including matte, satin, and gloss. The choice of finish depends on the desired aesthetic. Matte finishes tend to be more subtle and less reflective, while gloss finishes provide a more polished and reflective look. Color options are also important to consider. Choose a color that complements the surrounding décor and enhances the overall appearance of the fireplace area.
Aside from primer and paint, other essential materials include high-quality paintbrushes (if using liquid paint), a paint sprayer (optional for liquid paint), sandpaper of varying grits, a tack cloth, painter's tape, drop cloths, safety glasses, and a respirator. The respirator is crucial for protecting against inhaling paint fumes, especially when using aerosol paints. Ensure the work area is well-ventilated to minimize exposure to harmful vapors.
Always read and follow the manufacturer's instructions for both the primer and paint. These instructions provide specific guidelines on application techniques, drying times, and safety precautions. Deviating from the manufacturer's recommendations can compromise the quality and durability of the finish.
Key Point 3: Application and Curing
The application process requires patience and attention to detail to achieve a smooth, even, and durable finish. Applying the primer and paint in thin, even coats is crucial to prevent drips, runs, and uneven coverage. Proper curing is equally important, as it allows the paint to fully harden and bond to the metal surface, ensuring long-lasting protection and aesthetic appeal.
Before applying the primer, shake the can or stir the liquid paint thoroughly to ensure the pigment is evenly dispersed. Hold the aerosol can approximately 8-10 inches from the surface of the insert and apply a thin, even coat using a sweeping motion. If using liquid paint, apply a thin coat with a high-quality paintbrush or paint sprayer. Avoid applying too much primer in one coat, as this can lead to drips and runs. Allow the primer to dry completely according to the manufacturer's instructions, typically for several hours or overnight.
Once the primer is dry, inspect the surface for any imperfections, such as drips, runs, or uneven areas. If necessary, lightly sand the primed surface with fine-grit sandpaper (around 320-grit) to smooth out any imperfections. Wipe down the insert with a tack cloth to remove any sanding dust before applying the first coat of paint.
Apply the high-temperature paint in the same manner as the primer, using thin, even coats. Allow each coat to dry completely before applying the next. Multiple thin coats are preferable to one thick coat, as they provide better coverage and prevent drips and runs. Typically, two to three coats of paint are sufficient to achieve a durable and aesthetically pleasing finish. Allow the final coat to dry for at least 24 hours before curing.
Curing is the process of heating the painted surface to allow the paint to fully harden and bond to the metal. The curing process typically involves gradually increasing the temperature of the fireplace insert over a period of several hours. Consult the paint manufacturer's instructions for specific curing recommendations. Generally, the curing process involves starting with a low temperature (around 250°F) for an hour, gradually increasing the temperature to the maximum rated temperature of the paint for another hour, and then allowing the insert to cool down completely.
During the curing process, it is normal for the paint to emit some fumes. Ensure the area is well-ventilated to minimize exposure to these fumes. Avoid touching the painted surface until it has completely cooled down, as the paint may still be soft and susceptible to damage. After the curing process is complete, the fireplace insert is ready to be used. The new coat of paint will provide a durable and aesthetically pleasing finish that enhances the overall appearance of the fireplace area.

How To Spray Paint A Brass Fireplace Insert Erfly House

How To Spray Paint A Brass Fireplace Insert Erfly House

How To Spray Paint A Brass Fireplace Insert Erfly House

How To Spray Paint A Brass Fireplace Insert Diy Projects Improve Your Home Inserts

How To Spray Paint A Brass Fireplace Insert Erfly House

How To Update Brass Fireplace Insert With Spray Paint Iekel Road Home

How To Spray Paint A Brass Fireplace Bright Green Door

How To Spray Paint A Brass Fireplace Bright Green Door

How To Prep Prime And Paint A Brick Fireplace Young House Love

How To Paint Metal Fireplace Surround Four Generations One Roof
Related Posts

