Replacing a Thermal Coupler in a Gas Fireplace
A gas fireplace provides supplemental heat and ambiance to a home. A critical component of a gas fireplace's operational safety is the thermal coupler, also sometimes referred to as a thermocouple. This device is responsible for sensing the presence of a pilot flame. If the pilot flame is extinguished, the thermal coupler shuts off the gas supply to prevent gas from leaking into the home, potentially causing an explosion or carbon monoxide poisoning. Over time, thermal couplers can fail due to corrosion, wear and tear, or soot buildup. Replacing a faulty thermal coupler is a task that can often be accomplished by a homeowner with the proper tools and understanding, though understanding when to call a certified professional is equally important.
This article will detail the process of replacing a thermal coupler in a gas fireplace. It is crucial to emphasize that working with gas appliances involves inherent risks. If at any point during this procedure you feel uncomfortable or unsure about your abilities, it is strongly advised to contact a qualified gas appliance technician. Always prioritize safety.
Identifying a Faulty Thermal Coupler
Before embarking on a replacement, it is vital to confirm that the thermal coupler is indeed the source of the problem. Several symptoms can indicate a failing thermal coupler. The most common symptom is the inability to keep the pilot light lit. You might be able to light the pilot flame, but it will extinguish as soon as you release the pilot button on the gas valve. This occurs because the gas valve relies on the electrical signal generated by the thermal coupler to remain open and supply gas to the pilot burner.
Another indication is inconsistent pilot light operation. The pilot light might stay lit for varying periods, or it might require multiple attempts to ignite. This erratic behavior suggests a weakening or intermittent connection within the thermal coupler itself.
To further diagnose the problem, a multimeter can be used to test the thermal coupler's output. With the pilot light lit, a healthy thermal coupler should generate a millivolt reading within the manufacturer's specified range, typically between 20 and 30 millivolts. A significantly lower reading indicates a faulty thermal coupler that needs replacement. Consult the fireplace's owner’s manual for the specific voltage range for your model.
Required Tools and Materials
Before starting the replacement process, gather the necessary tools and materials. This will ensure a smooth and efficient repair. The following items are typically required:
*New Thermal Coupler:
Obtain a replacement thermal coupler that is compatible with your fireplace model. The model number can usually be found on a label located inside the fireplace unit. Ordering the correct replacement is crucial for proper function and safety. *Screwdrivers:
A set of screwdrivers, including both Phillips and flathead types, will be necessary to remove access panels and disconnect the thermal coupler. *Wrenches:
An adjustable wrench or a set of open-end wrenches might be needed to loosen and tighten gas fittings. *Multimeter:
A multimeter is used to test the old thermal coupler and verify the output of the new one. *Wire Brush:
A wire brush can be used to clean terminals and connections, ensuring good electrical contact. *Penetrating Oil (Optional):
If any gas fittings are corroded or difficult to loosen, penetrating oil can help. *Pipe Dope or Teflon Tape:
For resealing any gas connections that are disconnected during the process. Use only products specifically rated for gas lines. *Flashlight or Headlamp:
Provides adequate lighting for working inside the fireplace. *Gloves:
To protect your hands. *Safety Glasses:
To protect your eyes. *Leak Detector:
A leak detector, either in spray bottle form or a soapy water solution, is essential for checking for gas leaks after the new thermal coupler is installed.Step-by-Step Replacement Procedure
The thermal coupler replacement process involves several steps. Each step should be performed with care and attention to detail.
1. Safety First: Shut Off the Gas Supply.
Before beginning any work, turn off the gas supply to the fireplace. This is typically accomplished by turning the gas shut-off valve located near the fireplace or at the main gas meter to the "off" position. Double-check to ensure the gas is completely shut off. Never skip this step.2. Access the Thermal Coupler.
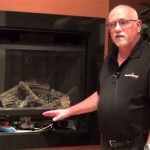
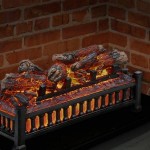
Typically, the thermal coupler is located near the pilot burner assembly. Accessing it usually requires removing the fireplace's front panel or grate, depending on the fireplace model. Consult the owner’s manual for specific instructions on accessing the pilot burner assembly.3. Disconnect the Old Thermal Coupler.
The thermal coupler has two connections: one at the gas valve and one at the pilot burner. First, locate the connection at the gas valve. It is commonly a small nut that secures the thermal coupler wire to the valve. Use a wrench to carefully loosen and disconnect this nut. Be gentle to avoid damaging the gas valve.Next, disconnect the thermal coupler from the pilot burner. It is usually held in place by a bracket or clip. Remove the clip or loosen the bracket to detach the thermal coupler from the burner. Gently pull the thermal coupler wire through any guides or supports to free it completely.
4. Install the New Thermal Coupler.
Place the tip of the new thermal coupler in the same position near the pilot flame as the old one. Secure it with the bracket or clip. Ensure that the thermal coupler is positioned correctly to be heated effectively by the pilot flame.Route the wire of the new thermal coupler back to the gas valve, following the same path as the old one. Connect the wire to the gas valve, tightening the nut securely. Avoid overtightening, as this can damage the gas valve threads.
5. Inspect and Clean Connections.
Before reassembling the fireplace, inspect all gas connections. If any connections were disconnected beyond the thermal coupler connections, ensure they are clean and free of debris. Apply pipe dope or Teflon tape designed for gas lines to the threads of any reconnected fittings. This will help ensure a gas-tight seal.6. Turn on the Gas Supply and Test for Leaks.
Slowly turn the gas supply back on. Apply a leak detection solution (either a commercially available product or a mixture of soapy water) to all gas connections that were disturbed during the replacement process. Look for bubbles forming, which indicate a gas leak. If a leak is detected, immediately turn off the gas supply and tighten the connection further. Reapply the leak detection solution and repeat the process until no leaks are detected.7. Light the Pilot Light and Verify Operation.
Follow the manufacturer's instructions to light the pilot light. Observe the pilot flame to ensure it is stable and properly heating the thermal coupler. Once the pilot light is lit, hold down the pilot button on the gas valve for the recommended time (usually 20-30 seconds). Release the button and verify that the pilot light remains lit. If the pilot light stays lit, the new thermal coupler is functioning correctly.8. Reassemble the Fireplace.
Once you have confirmed that the pilot light is functioning correctly and there are no gas leaks, reassemble the fireplace by replacing the front panel or grate.9. Test the Fireplace.
After reassembling the fireplace, turn on the main burner to ensure that the fireplace is operating correctly. Observe the flame pattern and listen for any unusual noises. If everything appears to be working as it should, the thermal coupler replacement is complete.This detailed process should equip a homeowner with the knowledge to replace a thermal coupler. However, always exercise caution and prioritize safety. Consider consulting a qualified gas appliance technician if any doubts or uncertainties arise during the procedure.

Gas Fireplace Won T Stay Lit Magic Touch Mechanical

Fireplace Pilot Light Not Working Replacing Thermocouple On A Remote Gas Very Easy

Know How To Replace A Gas Fireplace Thermocouple

Valor 4000061 Gas Fireplace Thermocouple

Fireplace Won T Stay Lit This Is How You Fix It

Gas Fireplace Won T Stay Lit Magic Touch Mechanical

Know How To Replace A Gas Fireplace Thermocouple

How To Replace A Thermocouple The Home Depot

Gas Fireplace Thermocouple Replacement China Oven Made In Com

Gas Fireplace 24 Thermocouple 750 Millivolt Replacement Com
Related Posts