Build an Outdoor Fireplace with Cinder Blocks: A Beginner's Guide
Summer nights are best enjoyed outdoors with family and friends. And what better way to create a warm and inviting atmosphere than with a cozy outdoor fireplace? Building an outdoor fireplace with cinder blocks is a relatively easy and cost-effective project that can be completed in a weekend. Here's a step-by-step guide to help you get started:
1. Plan Your Fireplace
The first step is to decide where you want to place your fireplace and what size and shape you want it to be. Consider the layout of your backyard and the space you have available. Once you have a plan, you can start gathering the materials you need.
2. Gather Your Materials
For this project, you will need the following materials:
- Cinder blocks
- Mortar mix
- Concrete pavers or flagstone for the hearth
- Fireplace grate
- Chimney flue
- Chimney cap
- Firebricks (optional)
3. Build the Base
Start by creating a level base for your fireplace. Dig a hole about 6 inches deep and wide enough to accommodate the base of your fireplace. Fill the hole with gravel and tamp it down to create a firm base.
4. Lay the First Course
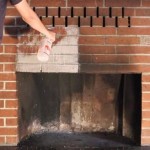
Lay the first course of cinder blocks around the perimeter of the base. Use a level to ensure that the blocks are level and square. Fill the gaps between the blocks with mortar mix.
5. Continue Building Up
Continue building up the walls of the fireplace by laying additional courses of cinder blocks. Stagger the joints between the blocks for added strength. Use mortar mix to fill the gaps between the blocks and to level the courses.
6. Create the Hearth
Once the walls of the fireplace are complete, it's time to create the hearth. This is the area in front of the fireplace where you will build your fires. Lay concrete pavers or flagstone on the ground in front of the fireplace and level them off.
7. Set the Fireplace Grate
Place the fireplace grate on top of the hearth. This will provide a stable surface for your fires and allow air to circulate underneath.
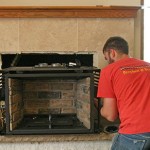
8. Install the Chimney Flue
Install the chimney flue at the back of the fireplace. The flue will allow smoke to escape and prevent it from entering your home. Secure the flue to the fireplace with mortar mix.
9. Install the Chimney Cap
Top off the chimney flue with a chimney cap. This will help to keep out rain and snow and prevent animals from nesting inside the chimney.
10. Cure the Fireplace
Once the fireplace is complete, it is important to allow it to cure for several days. This will give the mortar time to set properly and harden. During this time, do not use the fireplace.
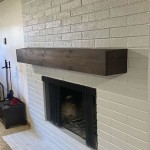
11. Enjoy Your Outdoor Fireplace
Once the fireplace is cured, you can finally enjoy the fruits of your labor. Gather your friends and family around the fire pit for a relaxing evening under the stars.

Cinder Blocks Are Easy To Find For Free And They Have Almost Unlimited Diy Potential Here S Outdoor Fireplace Plans Backyard

Concrete Block Outdoor Fireplace

Drystack Outdoor Fireplace How To Cost Material And Time

How To Build An Outdoor Fireplace With Cinder Blocks Google Search Plans Diy Backyard
:max_bytes(150000):strip_icc()/theshed-502c277988c14e118b4ad4f3cfc54a90.jpg?strip=all "10 Free Outdoor Fireplace Construction Plans")
10 Free Outdoor Fireplace Construction Plans

Modern Diy Fire Pit Easy Build

Chris Loves Julia Diy Outdoor Fireplace Home Sweet Homes

Concrete Block Outdoor Fireplace

Build An Outdoor Fireplace The Shed

How We Built Our Outdoor Fireplace Chris Loves Julia