DIY Mantel on Brick Fireplace
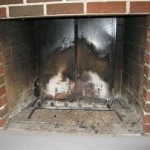
A brick fireplace can be a charming focal point in a room, but it often lacks the finishing touch of a mantel. While installing a traditional wood mantel on brick can be a challenging task, a DIY mantel offers a more manageable and customizable solution. This article will guide you through the process of creating a stylish and functional mantel on a brick fireplace, enhancing its aesthetic appeal and providing a dedicated space for displaying decorative accents and functional items.
Planning and Materials
The first step in creating a DIY mantel is planning its design and gathering the necessary materials. Consider the size and style of your fireplace, the overall aesthetic of the room, and your own personal preferences. For a simple and classic look, a basic shelf-style mantel may be sufficient. More elaborate designs can incorporate decorative elements like corbels, molding, or a raised shelf.
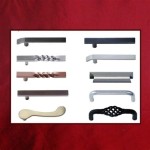
Here are some common materials for a DIY mantel project: *
Wood:
Pine, oak, or cherry are good choices for their affordability and durability. *Moulding:
Wood or composite molding can add decorative accents and create a more finished look. *Brackets:
Sturdy metal brackets are essential for supporting the mantel shelf. *Fasteners:
Use screws, nails, or construction adhesive appropriate for the chosen materials. *Paint or Stain:
Choose a finish that complements the existing fireplace and the overall room decor.Construction and Installation
Once you have gathered your materials, follow these steps to construct and install your DIY mantel: 1.
Measure and Cut:
Carefully measure the width of your fireplace to determine the length of your mantel shelf. Cut the wood planks to the desired length using a saw. 2.Attach Brackets:
Secure the brackets to the wall above the fireplace at the desired height. Ensure the brackets are level and firmly attached to the wall studs for stability. 3.Install Shelf:
Place the cut shelf on top of the brackets and secure it using screws or construction adhesive. 4.Add Moulding:
If you're using molding, attach it to the shelf and the wall around the fireplace to create a decorative frame. 5.Finish:
Sand any rough edges and apply paint or stain to achieve the desired finish. 6.Decorate:
Once the mantel is installed and finished, it's time to add decorative accents and functional items.Tips for Success
Here are some additional tips to ensure a successful DIY mantel project: *
Safety First:
Always wear safety glasses and gloves during the construction and installation process. *Level and Secure:
Use a level to ensure that the mantel and brackets are properly aligned and securely fastened. *Consider Weight:
Choose a shelf that can support the weight of the items you plan to display. *Personalize:
Don't be afraid to experiment with different styles and finishes to make your mantel unique.A DIY mantel can be a rewarding project that adds a touch of personalization and style to your fireplace. By following these steps and incorporating your own creativity, you can create a beautiful and functional mantel that complements your home and enhances its character.

How To Install A Mantel On Brick Fireplace 1905 Farmhouse

Diy Rustic Fireplace Mantel The Cure For A Boring

The Making Of A Slip Covered Mantel Made By Carli

How To Make A Diy Fireplace Mantel The Idea Room

Easy Fireplace Mantel Diy

How To Make A Diy Fireplace Mantel The Idea Room

Rough Hewn Wood Diy Fireplace Mantel Addicted 2 Decorating

Easy Fireplace Mantel Diy

Fireplace Makeover The Lettered Cottage Diy Remodel

How To Install A Mantel On Brick Fireplace 1905 Farmhouse
Related Posts