```html
Replacing a Fireplace Damper Plate: A Comprehensive Guide
The fireplace damper plate is a crucial component responsible for regulating airflow in and out of the chimney. Its primary function is to seal the chimney when the fireplace is not in use, preventing heat loss during the winter and keeping out unwanted pests, rain, and drafts year-round. Over time, damper plates can corrode, warp, or break due to exposure to high temperatures, moisture, and the elements. A faulty damper plate can significantly reduce the efficiency of a fireplace, leading to increased energy bills and potential safety hazards. Therefore, understanding the process of replacing a fireplace damper plate is essential for homeowners who rely on their fireplaces for supplemental heating or ambiance.
This article provides a detailed guide on how to replace a fireplace damper plate safely and effectively. It covers the necessary tools and materials, a step-by-step procedure for removal and installation, and important safety considerations to ensure a successful repair.
Identifying the Need for Damper Plate Replacement
Several indicators suggest that a damper plate requires replacement. One of the most obvious signs is visible damage, such as cracks, rust, or warping of the metal. These imperfections can compromise the damper's ability to create a tight seal, resulting in drafts entering the home. Another common symptom is difficulty opening or closing the damper. A sticking damper may indicate corrosion or a buildup of creosote, which can hinder its smooth operation. Furthermore, a noticeable increase in heating or cooling costs, despite consistent fireplace usage, may point to a faulty damper that is not effectively preventing air leakage.
Before proceeding with the replacement, it is crucial to thoroughly inspect the entire damper assembly, including the handle, hinge, and frame. Sometimes, issues with these components can mimic the symptoms of a damaged damper plate. If the problem lies solely with a loose handle or a corroded hinge, a simple repair might suffice. However, if the damper plate itself is damaged, replacement is the only viable solution.
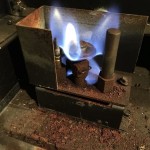
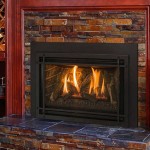
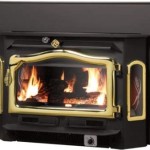
Different types of fireplace dampers exist, each with varying designs and mechanisms. Throat dampers are the most common type and are located directly above the firebox. Top-sealing dampers, also known as chimney-top dampers, are installed at the top of the chimney and offer a tighter seal than throat dampers. Regardless of the type, the replacement process generally involves similar steps.
Preparing for the Replacement: Tools and Materials
Prior to beginning the replacement process, gather all the necessary tools and materials. This preparation will streamline the procedure and ensure that the project can be completed efficiently. Essential tools include:
*Safety glasses and gloves: Protecting the eyes and hands from debris and sharp edges is paramount.
*A respirator or dust mask: Working in a chimney can expose individuals to dust, soot, and other particulate matter.
*A wire brush: This tool is used to clean the damper frame and surrounding area, removing any debris or corrosion.
*A putty knife or scraper: This is helpful for removing old sealant or mortar.
*A socket wrench set or adjustable wrench: These tools are needed to loosen and tighten bolts or nuts that secure the damper plate.
*A hammer and chisel (optional): If the damper is heavily rusted or stuck, these tools may be necessary to dislodge it.
*A measuring tape: Accurate measurements are essential for selecting the correct replacement damper plate.
*Penetrating oil (e.g., WD-40): Applying penetrating oil to rusted bolts or hinges can loosen them, making removal easier.
*A vacuum cleaner or shop vac: This is used to clean up dust and debris after the damper is removed.
In addition to the tools, the following materials are required:
*A replacement damper plate: Select a damper plate that is the same size and type as the original. Measure the existing damper plate carefully to ensure a proper fit. Consider opting for a stainless steel damper plate, as it offers superior corrosion resistance compared to cast iron.
*High-temperature sealant or refractory cement: This is used to seal any gaps between the damper frame and the chimney, preventing air leakage.
*Replacement hardware (bolts, nuts, screws): If the existing hardware is corroded or damaged, replacing it with new hardware is recommended.
Once all the tools and materials are assembled, the next step is to prepare the work area. Cover the hearth with a drop cloth to protect it from debris. Ensure adequate lighting to facilitate safe and accurate work. If possible, open windows or use a fan to improve ventilation.
Step-by-Step Damper Plate Replacement Procedure
The replacement process involves several crucial steps, each requiring careful attention to detail. First and foremost, ensure that the fireplace is completely cold before beginning any work. Never attempt to replace a damper plate immediately after using the fireplace.
Step 1: Removing the Old Damper Plate
Begin by loosening any bolts, nuts, or screws that hold the damper plate in place. Apply penetrating oil to any rusted hardware and allow it to soak for several minutes. Use a socket wrench or adjustable wrench to carefully remove the fasteners. If the hardware is severely corroded and cannot be removed, consider using a hammer and chisel to break it off.
Once the fasteners are removed, gently pry the damper plate loose from the frame. Use a putty knife or scraper to break any sealant or mortar that may be holding it in place. If the damper is stuck, try tapping it lightly with a hammer to dislodge it. Be careful not to damage the damper frame in the process.
Carefully remove the old damper plate from the chimney. Dispose of it properly, following local regulations for metal waste disposal.
Step 2: Cleaning and Preparing the Damper Frame
After removing the old damper plate, thoroughly clean the damper frame and surrounding area. Use a wire brush to remove any rust, soot, or debris. Vacuum the area to remove any loose particles. Inspect the damper frame for any damage, such as cracks or warping. If the frame is damaged, it may need to be repaired or replaced before installing the new damper plate.
Remove any old sealant or mortar from the frame using a putty knife or scraper. Ensure that the frame is clean and dry before applying new sealant. A clean surface will ensure a proper bond between the sealant and the frame.
Step 3: Installing the New Damper Plate
Position the new damper plate in the frame. Ensure that it fits snugly and aligns properly with the existing bolt holes or mounting points. If necessary, adjust the damper plate to ensure a proper fit. Use the replacement hardware (bolts, nuts, or screws) to secure the damper plate to the frame. Tighten the fasteners securely, but avoid over-tightening, which could damage the damper plate or frame.
Apply a bead of high-temperature sealant or refractory cement around the perimeter of the damper frame, where it meets the chimney. This will create a tight seal, preventing air leakage and improving the efficiency of the fireplace. Smooth the sealant with a finger or a putty knife to create a uniform finish.
Step 4: Testing the Damper
After installing the new damper plate, test its operation to ensure that it opens and closes smoothly. Check for any obstructions or binding. If the damper is difficult to operate, loosen the fasteners slightly and readjust the damper plate. Double-check the sealant to ensure that it is properly applied and that there are no gaps.
Allow the sealant to cure completely according to the manufacturer's instructions before using the fireplace. This may take several hours or even overnight. Once the sealant is cured, the fireplace is ready for use.
Following these steps carefully will help ensure a successful damper plate replacement, improving the efficiency and safety of the fireplace.
```
How To Fix A Stuck Fireplace Damper The Blog At Fireplacemall

What Is A Chimney Damper Full Service

33 Vestal Cast Iron Replacement Damper Plate V 33vp

Fireplace Dampers Throat Vs Top Mount Swede Chimney Sweep Dryer Vent Cleaning

What Is A Chimney Damper Full Service

Stainless Right Side Handle Replacement Damper Plate 5 X 36 1 4 Copperfield 03602903

What Is A Chimney Damper Full Service

How Do You Know When To Repair Your Chimney Damper Sweeps N Ladders

A Complete Guide To Chimney Damper Repair And It S Cost

Replacement Chimney Damper Handle Fireplace Rockford
Related Posts