Installing a Gas Fireplace Insert: A Comprehensive Guide
A gas fireplace insert offers an efficient and aesthetically pleasing upgrade to an existing masonry fireplace. It provides the warmth and ambiance of a traditional fire without the mess and inefficiency of burning wood. This article outlines the key steps involved in installing a gas fireplace insert, covering safety considerations, preparation, installation practices, and troubleshooting.
Before proceeding, it's crucial to acknowledge that gas appliance installation can be hazardous if performed incorrectly. Local building codes and regulations must be strictly adhered to, and it is strongly recommended to engage a qualified, licensed professional for the installation, especially if you lack relevant experience.
Preparing for the Installation
Thorough preparation is essential for a successful and safe gas fireplace insert installation. This phase involves assessing the existing fireplace, selecting the appropriate insert, obtaining necessary permits, and gathering the required tools and materials.
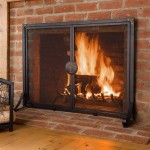
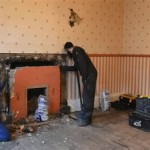
The initial step involves inspecting the existing masonry fireplace. A certified chimney sweep should conduct a comprehensive inspection to ensure the chimney is structurally sound and free from obstructions, creosote buildup, or other hazards. Any necessary repairs, such as tuckpointing or relining, must be completed before installing the insert. The dimensions of the existing fireplace opening must be accurately measured to ensure the chosen insert will fit properly. Pay close attention to the height, width, and depth of the firebox.
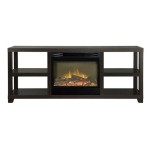
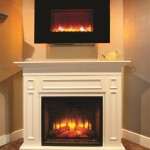
Choosing the right gas fireplace insert is a crucial decision. Consider factors such as the size of the area to be heated, the desired aesthetic style, and the efficiency rating of the insert. Gas fireplace inserts are typically rated by their British Thermal Unit (BTU) output, which indicates the amount of heat they produce per hour. Select an insert with a BTU rating appropriate for the room size. Different venting options are available, including direct vent, B-vent, and vent-free models. Direct vent inserts are the most efficient and safest option, as they draw combustion air from outside the home and vent exhaust gases directly outdoors. B-vent inserts use existing chimneys for venting, while vent-free models do not require venting. Vent-free models are generally not recommended due to concerns about indoor air quality and potential carbon monoxide buildup.
Obtaining the required permits is a necessary step before commencing the installation. Contact the local building department to determine the specific permits needed for gas fireplace insert installation. This typically involves submitting an application, providing detailed plans of the installation, and paying the required fees. Failure to obtain the necessary permits can result in fines, delays, and potentially unsafe installation practices.
Gather all the necessary tools and materials before starting the installation. This includes: a gas fireplace insert kit (including the insert itself, venting components, and trim), a drill, screwdrivers, a level, a measuring tape, a pipe wrench, a gas pipe sealant, a carbon monoxide detector, safety glasses, and gloves. A gas leak detector is also highly recommended to ensure the connections are leak-free after installation.
Installing the Gas Fireplace Insert
The installation process itself requires careful attention to detail and adherence to manufacturer's instructions. Disconnecting the existing gas supply, preparing the fireplace opening, installing the venting system, connecting the gas line, and testing the insert are all critical steps in the process.
Before starting any work on the gas line, it is imperative to shut off the gas supply to the fireplace. Locate the gas shut-off valve for the fireplace and turn it to the "off" position. To confirm the gas is completely shut off, test a nearby gas appliance (such as a gas stove) to ensure it does not operate. Disconnecting the existing gas line should only be done by a qualified professional to prevent gas leaks and potential explosions.
Prepare the fireplace opening by cleaning it thoroughly and removing any debris or obstructions. Install a metal liner inside the existing chimney to provide a safe and efficient venting system. The liner should be sized appropriately for the gas fireplace insert and installed according to the manufacturer's instructions. Properly insulating the space between the liner and the chimney walls can improve efficiency and prevent condensation.
The venting system is a crucial component of the gas fireplace insert installation. Install the venting components according to the manufacturer's instructions, ensuring all connections are secure and properly sealed. Use appropriate venting materials, such as stainless steel or aluminum, depending on the type of insert and local building codes. Ensure the venting system is properly supported and that it extends to the required height above the roofline to prevent backdrafting and ensure proper ventilation.
Connecting the gas line to the gas fireplace insert should only be performed by a qualified professional. The gas line must be sized appropriately for the insert's BTU input rating and installed according to local gas codes. Use a gas pipe sealant on all threaded connections to prevent leaks. After connecting the gas line, test all connections with a gas leak detector to ensure there are no leaks. If any leaks are detected, immediately shut off the gas supply and repair the leak before proceeding.
Once the venting system and gas line are properly installed, carefully slide the gas fireplace insert into the fireplace opening. Ensure the insert is level and properly aligned with the fireplace surround. Connect the gas line to the insert's gas valve and test all connections for leaks again. Install the trim or surround according to the manufacturer's instructions. This will provide a finished look and seal the insert to the fireplace opening.
After the insert is installed and all connections are verified, turn on the gas supply and test the fireplace insert according to the manufacturer's instructions. Check for proper ignition, flame height, and venting. Monitor the insert for any unusual noises, odors, or malfunctions. Install a carbon monoxide detector near the fireplace to provide an early warning of any carbon monoxide buildup.
Troubleshooting Common Issues
Even with careful installation, certain issues might arise during or after the gas fireplace insert installation. Addressing these problems promptly is important to ensure safe and efficient operation.
One common issue is difficulty with ignition. If the gas fireplace insert fails to ignite, check the gas supply to ensure it is turned on and that there is sufficient gas pressure. Inspect the igniter or pilot light for proper operation. Clean the igniter or pilot light if it is dirty or corroded. If the problem persists, consult the manufacturer's troubleshooting guide or contact a qualified service technician.
Another frequent problem is the presence of gas odors. If you smell gas, immediately shut off the gas supply to the fireplace and ventilate the area. Inspect all gas line connections for leaks using a gas leak detector. If you detect a leak, repair it immediately. If you cannot locate the source of the gas odor, contact a qualified gas service technician for assistance.
Poor venting can also cause problems with gas fireplace inserts. Insufficient venting can lead to backdrafting, which can result in carbon monoxide buildup in the home. Ensure the venting system is properly installed and that it meets the manufacturer's specifications. Check the chimney for obstructions and ensure it is properly cleaned and maintained. If you suspect a venting problem, consult a qualified chimney sweep or HVAC technician.
Condensation inside the chimney can occur, especially in cold climates. This can lead to corrosion and damage to the chimney liner. Properly insulating the space between the liner and the chimney walls can help reduce condensation. Ensure the chimney cap is in good condition and that it prevents rain and snow from entering the chimney.
Unusual noises from the gas fireplace insert can indicate a mechanical problem. Squealing noises may indicate a problem with the blower motor, while rattling noises may indicate loose components. Inspect the insert for any visible damage or loose parts. If you cannot identify the source of the noise, contact a qualified service technician.
By following these steps and addressing any potential issues promptly, you can ensure a safe and efficient gas fireplace insert installation, providing warmth and ambiance for years to come. Always prioritize safety and consult with qualified professionals when necessary.

How To Install A Fireplace Insert Diy Save Money

Convert To Gas Installing Fireplace Inserts Doctor Flue

How To Install Gas Fireplace Insert Heat Glo

Fireplace Insert Installation Wood Inserts Gas Pellet And Electric

Best Fireplace Insert Repair Installs Ton Service

How To Install Gas Fireplace Insert Heat Glo

Custom Installation Of Fireplace Inserts Insert Installations Sierra Hearth And Home

Lodi Wi Installing Fireplace Insert Remodel

How To Select And Install A Gas Fireplace Log Set Fireplaces Direct Learning Center

Fireplace Insert Installation Step By Forbes Home
Related Posts