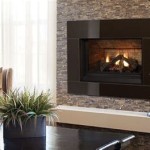
DIY Electric Fireplace Insert Installation: A Comprehensive Guide
An electric fireplace insert offers a convenient and aesthetically pleasing alternative to traditional wood-burning fireplaces. It provides the ambiance of a flickering flame and supplemental heat without the mess, safety concerns, and venting requirements associated with its traditional counterpart. Installing an electric fireplace insert is a project that can often be undertaken by a homeowner with basic DIY skills, saving on professional installation costs. This article provides a detailed guide to installing an electric fireplace insert, covering essential preparation steps, installation procedures, and troubleshooting tips.
Preparing for Installation: Assessment and Planning
Before commencing the installation process, a thorough assessment of the existing fireplace and the chosen electric insert is crucial. This involves several key steps to ensure compatibility and a safe, efficient setup. First, measure the existing fireplace opening – height, width, and depth – meticulously. These dimensions must be compared with the specifications of the electric fireplace insert to guarantee a proper fit. Allowing for a small amount of clearance around the insert is advisable to facilitate airflow and prevent overheating. The insert should not be forced into the opening, as this could damage the unit or the surrounding structure.
Next, inspect the existing fireplace structure for any signs of damage or deterioration. Cracks, loose bricks, or crumbling mortar should be addressed before installing the insert. Minor repairs can be completed with appropriate masonry patching compounds. If the damage is extensive, consulting a qualified mason is recommended to ensure the structural integrity of the fireplace. The cleanliness of the fireplace is another important consideration. Remove any accumulated soot, ash, or debris from the firebox and chimney flue (if accessible). This will minimize potential odors and improve the overall aesthetic appeal.
Electrical considerations are paramount. Determine the power requirements of the electric fireplace insert, as specified in the manufacturer's documentation. Ensure that the existing electrical circuit can handle the load without overloading. A dedicated circuit is often recommended, particularly for inserts with higher heating outputs. Check the electrical outlet near the fireplace; it should be a grounded outlet and meet the voltage and amperage requirements of the insert. If necessary, a qualified electrician should install a new outlet or upgrade the existing wiring to meet the insert's power demands.
Finally, gather all necessary tools and materials. This includes a measuring tape, level, screwdriver (both Phillips and flathead), drill with appropriate drill bits, safety glasses, work gloves, and any specific mounting hardware provided by the insert manufacturer. Having all the tools readily available will streamline the installation process and minimize interruptions.
Installation Procedure: Step-by-Step Guide
With the preparation complete, the actual installation can proceed. Begin by carefully unpacking the electric fireplace insert and inspecting it for any shipping damage. Refer to the manufacturer's instructions for specific assembly requirements. Some inserts may require attaching legs, trim pieces, or decorative elements before installation.
Carefully position the electric fireplace insert into the fireplace opening. Ensure that it is properly aligned and centered. Use a level to verify that the insert is sitting evenly. If necessary, shim the insert to achieve perfect alignment. The insert should fit snugly within the opening, but avoid forcing it. If there is excessive space around the insert, consider using trim pieces or filler material to create a more finished look.
Secure the electric fireplace insert to the fireplace structure, using screws or mounting brackets as provided by the manufacturer. Drill pilot holes before inserting screws to prevent cracking or splitting the surrounding material. Ensure that the insert is securely anchored to prevent movement or tipping. Follow the manufacturer's instructions regarding the recommended mounting method. Some inserts may simply rest within the opening, while others require more robust attachment.
Connect the electric fireplace insert to the electrical outlet. Ensure that the power switch is in the "off" position before plugging in the unit. The power cord should be routed in a way that prevents tripping hazards or damage. Avoid running the cord under rugs or furniture, where it could become pinched or overheated.
Test the functionality of the electric fireplace insert. Turn on the power switch and verify that the flame effect and heater operate correctly. Check all settings and controls to ensure they are functioning as intended. If any issues are encountered, consult the manufacturer's troubleshooting guide or contact technical support.
Troubleshooting and Maintenance
Even with careful planning and execution, minor issues may arise during or after installation. One common problem is the flame effect not working. This could be due to a loose connection, a faulty bulb, or a malfunctioning motor. Check all connections and replace any damaged components. Ensure that the light bulb is correctly installed and functioning.
Another potential issue is the heater not producing heat. Verify that the thermostat is set to the desired temperature and that the heater is enabled. Check the circuit breaker to ensure that it has not tripped. If the heater still does not work, there may be a problem with the heating element or the blower motor. In such cases, contacting the manufacturer or a qualified repair technician is recommended.
Regular maintenance is essential to ensure the longevity and optimal performance of the electric fireplace insert. Clean the exterior surface of the insert with a soft, damp cloth. Avoid using abrasive cleaners or solvents, as they could damage the finish. Periodically inspect the air vents for dust and debris. Use a vacuum cleaner with a brush attachment to remove any accumulated buildup. Refer to the manufacturer's instructions for specific maintenance recommendations.
By following these guidelines, homeowners can successfully install an electric fireplace insert and enjoy the warmth and ambiance it provides. Remember to prioritize safety and consult with qualified professionals when necessary.

How To Build A Diy Fireplace For An Electric Insert From Scratch White And Woodgrain

How To Build A Diy Fireplace For An Electric Insert From Scratch White And Woodgrain

Diy Electric Fireplace Full Hearted Home

Electric Fireplace Frame How To Build And Install It Very Good

Diy Fireplace With Electric Insert Angela Marie Made

Built In Electric Fireplace Lolly Jane
How To Install An Electric Fireplace Insert

How To Build A Diy Built In Fireplace With An Electric Insert The Creative Mom

Diy Fireplace With Electric Insert Angela Marie Made

How To Build An Electric Fireplace With A Hearth
Related Posts


