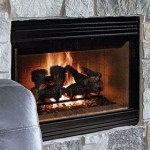
DIY Rustic Fireplace Mantel: A Step-by-Step Guide
A fireplace mantel serves as a focal point in a living space, offering both aesthetic appeal and functional space for displaying decorative items. Embracing a rustic aesthetic lends character and warmth to any room, creating an inviting atmosphere. This article provides a comprehensive guide to constructing a DIY rustic fireplace mantel, detailing the process from material selection to installation.
Before commencing the project, it is crucial to assess the existing fireplace structure, local building codes, and personal design preferences. Accurate measurements of the fireplace opening and surrounding wall space are essential for determining the appropriate dimensions of the mantel. Moreover, a clear understanding of the desired style—whether a traditional barn beam look, a weathered coastal vibe, or a more refined rustic design—will inform material choices and construction techniques.
Key Point 1: Material Selection and Preparation
The selection of materials is paramount in achieving the desired rustic aesthetic. Reclaimed wood is a popular choice, offering inherent character and a story to tell. Options include salvaged barn beams, reclaimed lumber from old buildings, or even driftwood for a coastal-inspired look. Alternatively, new lumber can be used and aged to simulate a rustic appearance.
When choosing reclaimed wood, it is imperative to thoroughly inspect the material for structural integrity. Look for signs of rot, insect infestation, or excessive warping. If any of these issues are present, consider alternative pieces or treatment options. Cleaning the wood is the next crucial step. A wire brush can remove loose debris, dirt, and flaking paint. For stubborn residue, a pressure washer can be used, but caution must be exercised to avoid damaging the wood. Allow the wood to dry completely before proceeding to the next step.
Regardless of whether you choose reclaimed or new lumber, proper preparation is essential. This includes sanding the wood to achieve a smooth surface while preserving its natural texture. A coarse-grit sandpaper (e.g., 80-grit) can be used initially to remove any rough edges or imperfections, followed by a medium-grit (e.g., 120-grit) to refine the surface. For a more authentic rustic look, avoid excessive sanding, allowing some imperfections to remain.
If new lumber is used, several techniques can be employed to achieve a weathered or aged appearance. These include distressing the wood with tools like chains, hammers, or chisels to create dents and gouges. Applying layers of different stains and allowing them to partially dry before wiping them off can also add depth and character to the wood. A vinegar and steel wool solution can create a grayed, aged effect. Combine steel wool with white vinegar in a sealed container and let it sit for several days. Strain the mixture and apply it to the wood, observing as it ages and darkens.
Safety precautions are critical during material preparation. Wear appropriate personal protective equipment, including safety glasses, gloves, and a dust mask, to prevent injuries from splinters, dust, and chemical exposure. Work in a well-ventilated area, especially when using stains or chemicals.
Key Point 2: Construction and Assembly
The construction of the mantel involves cutting the chosen wood to the desired dimensions and assembling the individual components. Accurate measurements are crucial for ensuring a proper fit and aesthetic balance. Use a tape measure, level, and square to ensure precise cuts and alignment.
Cutting the wood can be accomplished using a variety of saws, including a circular saw, miter saw, or hand saw. A miter saw provides the most accurate and clean cuts, especially for angled edges. Always use appropriate safety equipment, such as safety glasses and hearing protection, when operating power tools.
The method of assembly depends on the desired design and the structural support required. For a simple mantel shelf, the wood can be directly attached to the fireplace wall using heavy-duty mounting hardware, such as L-brackets or mantel brackets. These brackets should be securely fastened to the wall studs using screws or bolts. Locate the studs using a stud finder before drilling pilot holes. Ensure the brackets are level and evenly spaced to distribute the weight of the mantel uniformly.
For a more substantial mantel with a box-beam construction, the wood is typically assembled using screws, nails, or wood glue. The frame consists of several pieces of wood that are joined together to create a hollow box. This construction method offers a lightweight yet strong structure that can support significant weight. When using screws, countersink the screw heads to create a flush surface and prevent them from protruding. Wood glue provides additional strength and helps to fill any gaps between the wood pieces. Clamps can be used to hold the pieces together while the glue dries.
If the mantel is intended to wrap around an existing fireplace structure, precise measurements and cuts are critical to ensure a seamless fit. The mantel can be constructed in sections and then assembled around the fireplace. Use shims to level and align the different sections before permanently attaching them to the wall. Caulk can be used to fill any small gaps and create a clean, finished look.
Key Point 3: Installation and Finishing Touches
The installation process must prioritize safety and adherence to local building codes. Before attaching the mantel to the fireplace wall, ensure that the wall is structurally sound and capable of supporting the weight of the mantel. If the wall is made of brick or stone, use appropriate masonry anchors to secure the mounting hardware.
Position the mantel at the desired height above the fireplace opening. Consult local building codes for specific requirements regarding the minimum distance between the mantel and the firebox. Use a level to ensure that the mantel is perfectly horizontal before attaching it to the wall. Mark the location of the mounting holes on the wall using a pencil or marker. Drill pilot holes at the marked locations, and then insert the appropriate anchors or screws.
Once the mantel is securely attached to the wall, the finishing touches can be applied to enhance its rustic aesthetic. This may include applying a sealant or varnish to protect the wood from moisture and wear. Choose a sealant or varnish that is compatible with the type of wood used and that complements the overall design. Apply the sealant or varnish in thin, even coats, allowing each coat to dry completely before applying the next.
Decorative elements can be added to further customize the mantel and enhance its rustic charm. These may include decorative brackets, corbels, or moldings. These elements can be attached to the mantel using screws, nails, or wood glue. Consider adding metal accents, such as wrought iron hinges or decorative nails, to enhance the rustic feel.
Finally, arrange decorative items on the mantel to create a visually appealing display. Consider using a combination of natural elements, such as pinecones, branches, or stones, along with vintage or antique items, such as old clocks, lanterns, or candlesticks. Arrange the items in a balanced and visually pleasing way, taking into account the size, shape, and color of each item. Overcrowding the mantel can detract from its rustic charm, so strive for a minimalist and uncluttered look.
Maintaining the rustic fireplace mantel involves regular cleaning and occasional refinishing. Dust the mantel regularly with a soft cloth to prevent dirt and debris from accumulating. Avoid using harsh chemicals or abrasive cleaners, as these can damage the wood finish. If the mantel becomes stained or damaged, it can be refinished by sanding the surface and applying a new coat of sealant or varnish.
By following these steps, individuals can successfully construct a DIY rustic fireplace mantel that enhances the aesthetic appeal and functionality of their living space. The project offers an opportunity for creativity and personalization, resulting in a unique and cherished focal point. The careful selection of materials, precise construction techniques, and thoughtful finishing touches will ensure a lasting and beautiful addition to any home.

Diy Rustic Fireplace Mantel The Cure For A Boring

Diy Rustic Fireplace Mantel The Cure For A Boring

Diy Rustic Fireplace Mantel Domestically Speaking

Diy Rustic Fireplace Mantel The Cure For A Boring

Diy Rustic Fireplace Mantel Domestically Speaking

Diy Rustic Fireplace Mantel Domestically Speaking

Weathered Barn Wood Fireplace Mantel Diy Pine And Prospect Home

Diy Rustic Fireplace Mantel The Cure For A Boring

How To Build And Hang A Mantel On Stone Fireplace Shanty 2 Chic

Diy Rustic Mantel Farmhouse Fireplace Decor
Related Posts

