DIY Fireplace Surround: Enhance Your Home's Focal Point
A fireplace is often the centerpiece of a room, drawing attention and bringing warmth to the space. However, a bare fireplace can lack visual appeal. A fireplace surround, the decorative frame encasing the hearth, serves to enhance the fireplace's aesthetic and integrate it seamlessly into the room's design. While hiring a professional for this project can be expensive, a DIY fireplace surround offers a cost-effective and rewarding way to personalize your living space. This article explores key considerations and steps involved in creating a DIY fireplace surround.
Choosing the Right Material
The first step involves selecting the material that best aligns with your aesthetic preferences and budget. From traditional stone and brick to modern materials like reclaimed wood and metal, a wide variety of options are available. Here's a brief overview of popular choices:
- Stone: Natural stone, such as limestone, granite, or slate, adds elegance and durability. Its versatility allows for various designs, from rustic to modern.
- Brick: Brick offers a classic look and a timeless appeal. It's durable and can be painted or left exposed for a more rustic feel.
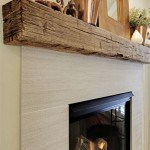
- Wood: Reclaimed wood adds character and warmth to the fireplace. It blends well with rustic and farmhouse styles.
- Metal: Metal, particularly steel or copper, lends a contemporary and industrial vibe to the fireplace. Its sleek finish complements modern decor.
- Mantel: A mantle is an optional addition that provides a decorative shelf for displaying items. It can be made from various materials like wood, stone, or metal.
Planning and Preparation
After selecting the material, carefully plan the design and dimensions of the fireplace surround. Measure the existing fireplace opening accurately to ensure a snug fit. Consider the size and shape of the surround, the presence of a mantle, and its overall aesthetic.
Before beginning the installation, prepare the area around the fireplace. Remove any existing trim or materials. Protect the surrounding walls and floors with drop cloths to prevent damage. Carefully assess the existing fireplace structure and ensure it's in good condition. If necessary, repair any cracks or loose bricks.
Installation Process
The installation process varies depending on the chosen material. Stone and brick typically require mortar, while wood and metal might involve adhesives. For example, to install a brick surround, you'll need to mix mortar and apply it to the back of each brick before placing it on the fireplace wall. Ensure each brick is level and flush with the previous one.
When working with wood, use wood glue and screws to secure the pieces together. For metal, you might need to use welding or specialized adhesives. Regardless of the material, follow the manufacturer's instructions and safety precautions during the installation process.
After installing the surround, allow the adhesive or mortar to cure completely before proceeding with the next steps. A sealant can be applied to protect the material and enhance its lifespan.
Enhancing the Surround
Once the surround is installed, you can further enhance its appearance. Choose decorative accents like a hearth rug, fireplace screen, or decorative mantel pieces. Mirrors placed above the fireplace can create the illusion of a larger space and reflect light. Lighting around the fireplace can accentuate its features and enhance the ambiance of the room, adding a touch of warmth and sophistication to your space.
With careful planning and attention to detail, a DIY fireplace surround can truly transform your home's centerpiece, adding charm, elegance, and functionality to your living space.

Diy Fireplace Mantel Designatedspacedesign Com

Diy Fireplace Mantel And Surround Jenna Kate At Home
:max_bytes(150000):strip_icc()/sandandsisal-bdc76ad938a44d28ae9e23ef6c9fa331.jpg?strip=all)
17 Diy Fireplace Mantel Plans

Diy Rustic Fireplace Mantel The Cure For A Boring

Diy Electric Fireplace Full Hearted Home

How To Build A Diy Built In Fireplace With An Electric Insert The Creative Mom

Diy Fireplace With Electric Insert Angela Marie Made

Building An Easy Modern Fireplace Mantel Young House Love

How To Build A Fireplace Mantel Easy Diy Blossoming Life

Diy Faux Plaster Fireplace Surround Chelsey Freng

